



A diamond painting kit often begins with a beautifully detailed preview image. The colors look smooth, facial features appear sharp, and tiny background elements are easy to recognize. After placing thousands of drills, however, you may step back and wonder why your finished canvas does not look exactly like that photo.
The reason is usually technical rather than personal. Diamond painting converts a continuous image into a limited grid of solid-colored resin drills. During that conversion, detail, color, and contrast must be simplified.
Understanding this process will help you evaluate kits more accurately, choose better canvas sizes, and improve the appearance of your finished artwork.
TOOLS THAT HELP YOU EVALUATE AND IMPROVE THE RESULT
- Bright, neutral-white work lamp;
- Light pad for symbol visibility;
- Diamond painting pen and fresh pink wax;
- Multiplacer for large color blocks;
- Fine-point tweezers;
- Straightening tool or ruler;
- Roller or brayer;
- Replacement drills;
- Magnifying glass;
- Foam board or temporary mounting surface.
1. THE PREVIEW IMAGE IS NOT THE ACTUAL DIAMOND PAINTING CHART
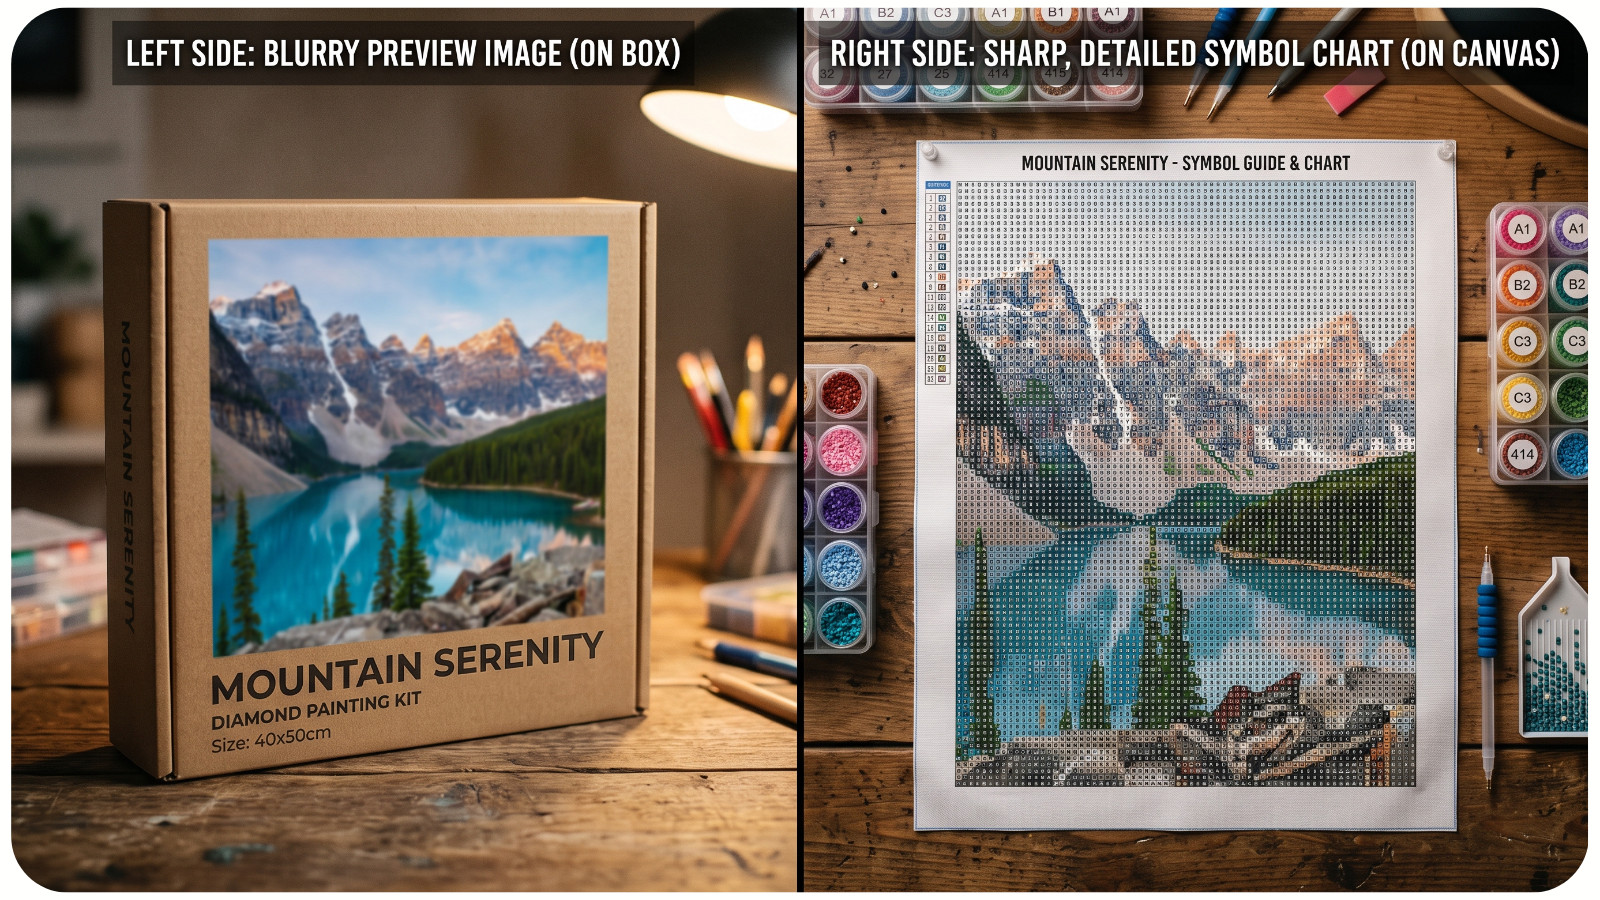
The product photo is often based on the original artwork, not a photograph of the completed diamond painting.
An original digital illustration may contain millions of colors, soft gradients, fine lines, subtle shadows, and tiny details. A diamond painting canvas cannot reproduce all of that information. It must translate the artwork into a fixed grid, with one drill representing one small area of the image.
This process is similar to reducing a high-resolution photograph into pixel art.
The smaller the canvas, the fewer “pixels” are available. Fine eyelashes, flower petals, fur strands, lettering, and distant objects may be represented by only a few drills. Some details may disappear completely during conversion.
A reliable product listing should ideally show a rendered chart preview or a photograph of the completed canvas – not only the original artwork.
2. CANVAS SIZE CONTROLS THE AVAILABLE RESOLUTION
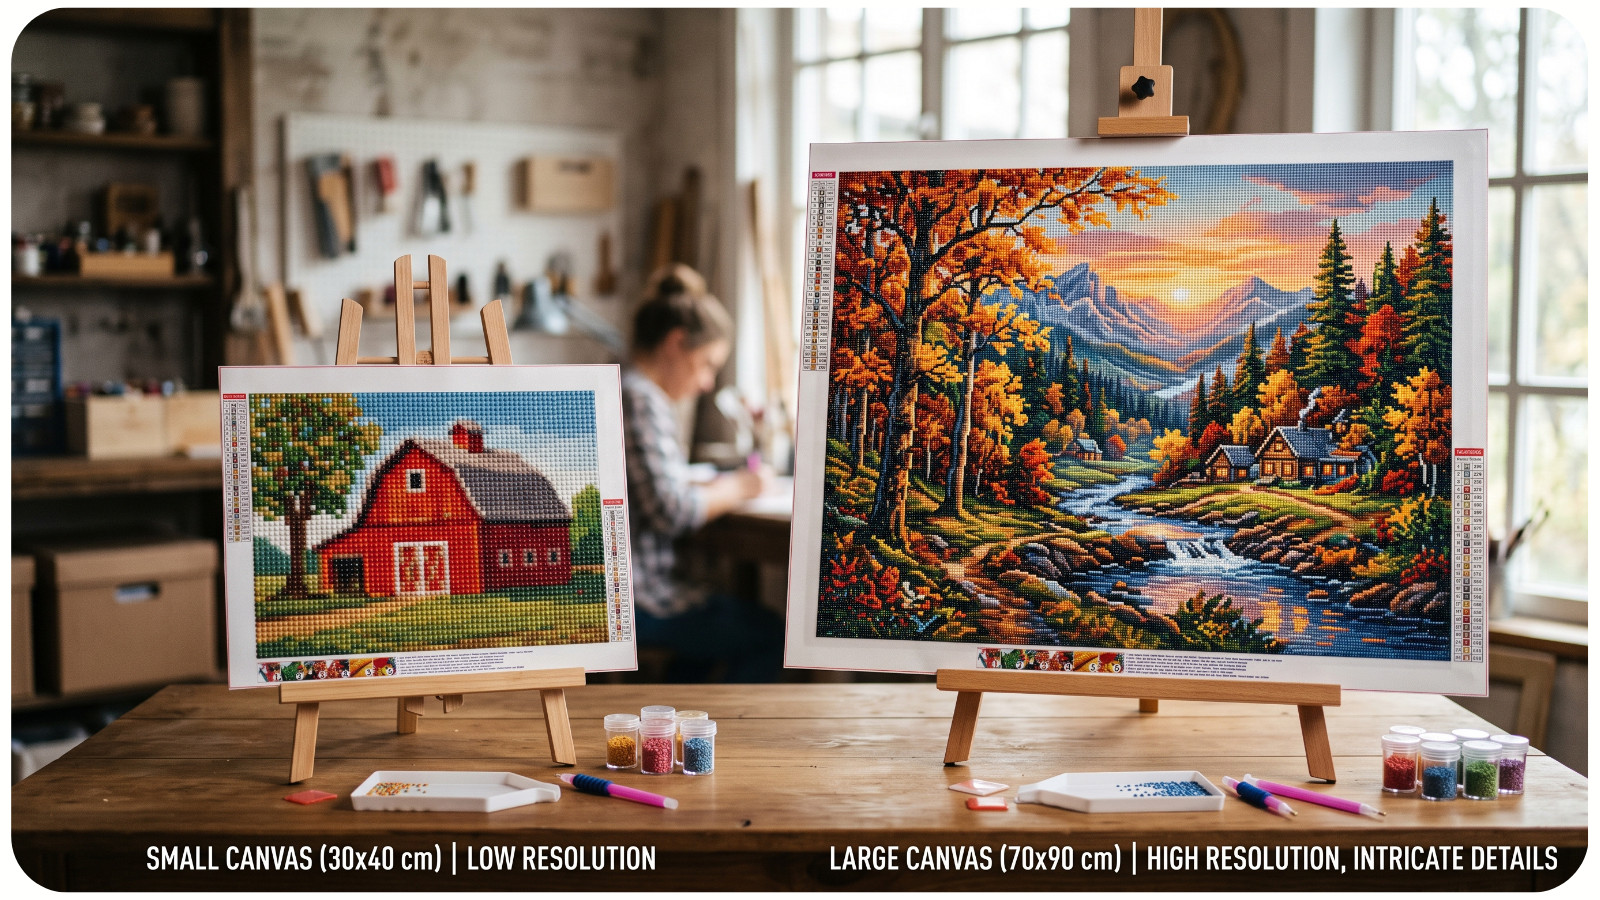
Canvas dimensions are one of the most important factors affecting image quality.
Standard diamond painting drills are approximately 2.5 to 2.8 millimeters wide, depending on their shape and manufacturer. Because each drill occupies one grid square, a larger canvas contains more grid squares and therefore more visual information.
For example, a small portrait may not have enough grid space to define:
- The shape of the eyes;
- The separation between lips and skin;
- Individual fingers;
- Small jewelry;
- Strands of hair;
- Subtle facial shadows.
When the same design is enlarged, the charting software has more drills available to represent those features. Transitions become smoother, outlines become clearer, and small elements are easier to recognize.
Complex subjects generally require larger canvases than simple subjects. A minimalist flower with a plain background can remain clear at a relatively small size. A detailed landscape, realistic animal, or multi-person portrait usually needs considerably more space.
3. DIAMOND PAINTING USES A LIMITED COLOR PALETTE
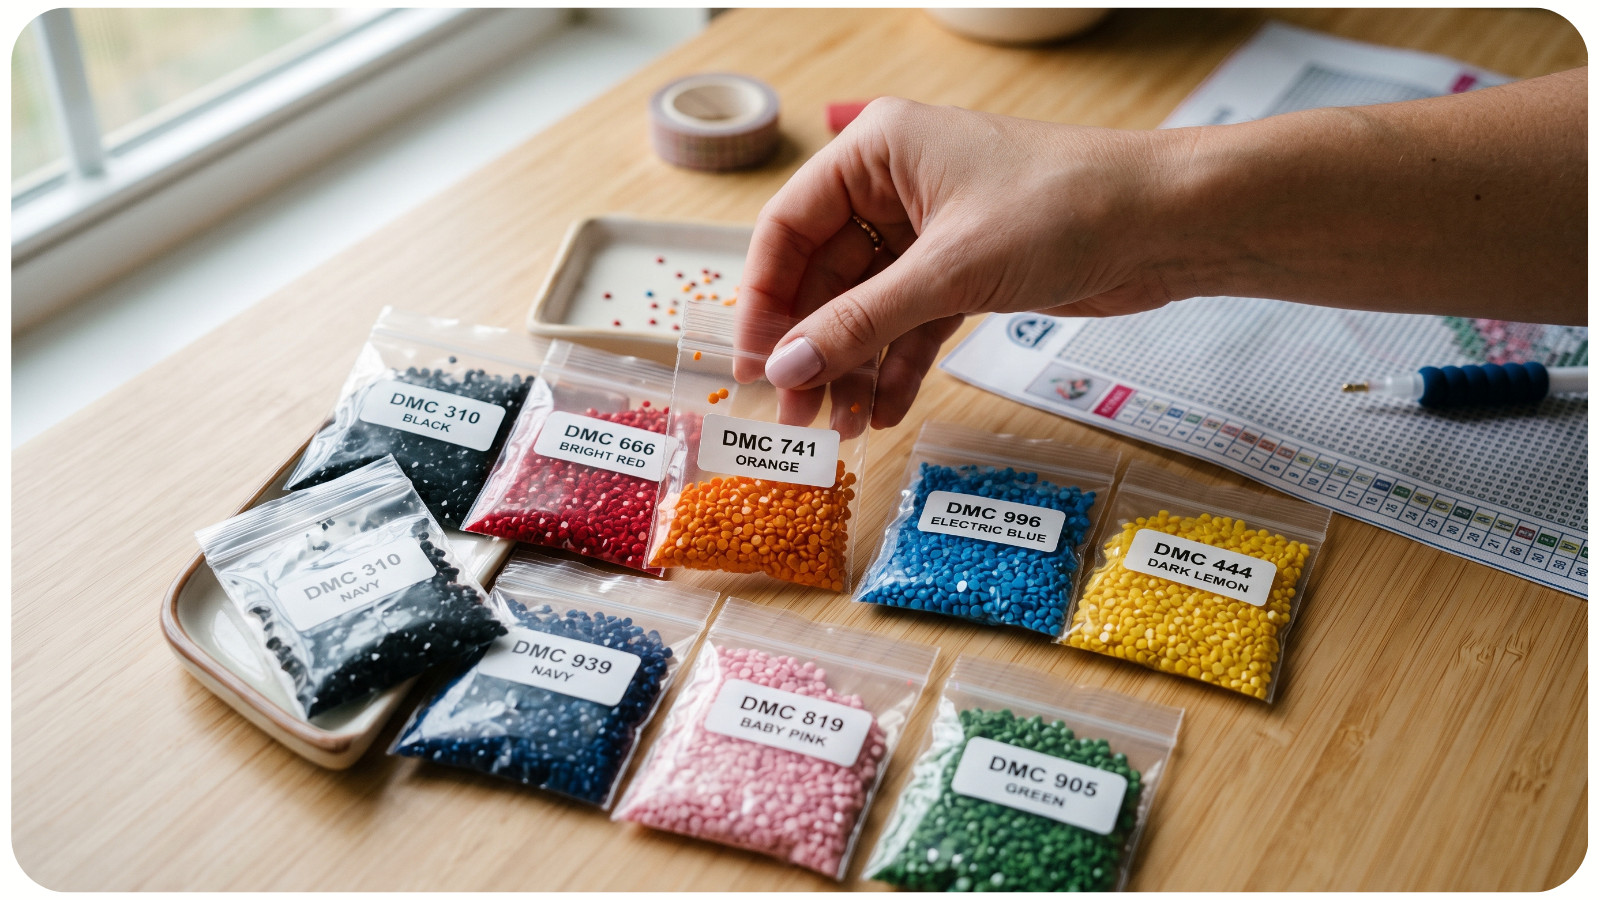
A photograph can display extremely subtle variations in hue, saturation, brightness, and temperature. Diamond painting kits use a limited collection of manufactured drill colors.
During chart creation, every area of the original image must be matched to the nearest available drill color. Several slightly different shades may therefore be merged into one color.
This is called color quantization.
Color quantization can cause:
- Skin tones to appear flatter;
- Shadows to look darker or more abrupt;
- Smooth skies to develop visible bands;
- Pale objects to blend into the background;
- Warm colors to shift slightly cooler;
- Small highlights to disappear.
Good charting does more than match colors mechanically. It also preserves important contrast between adjacent areas. Expert rendering may intentionally select a lighter, darker, warmer, or cooler drill to keep a feature visible.
Poorly converted charts often include unnecessary color confetti without preserving meaningful detail. A well-rendered chart uses color changes strategically.
4. YOUR SCREEN CHANGES HOW THE REFERENCE IMAGE LOOKS
The photograph on your phone, tablet, or computer is illuminated from behind. Diamond painting drills reflect light from their surfaces. These are fundamentally different viewing conditions.
Screens often make colors appear:
- Brighter;
- More saturated;
- More luminous;
- Higher in contrast;
- Smoother in gradient transitions.
A completed canvas may appear darker because it depends on external light. Dark drills absorb more light, while faceted surfaces reflect highlights in different directions.
Display settings also matter. Screen brightness, color temperature, blue-light filters, and display calibration can all change the appearance of the reference image.
For a fair comparison, view the finished canvas in bright, neutral lighting rather than comparing it with a highly illuminated phone screen.
5. VIEWING DISTANCE CHANGES THE IMAGE
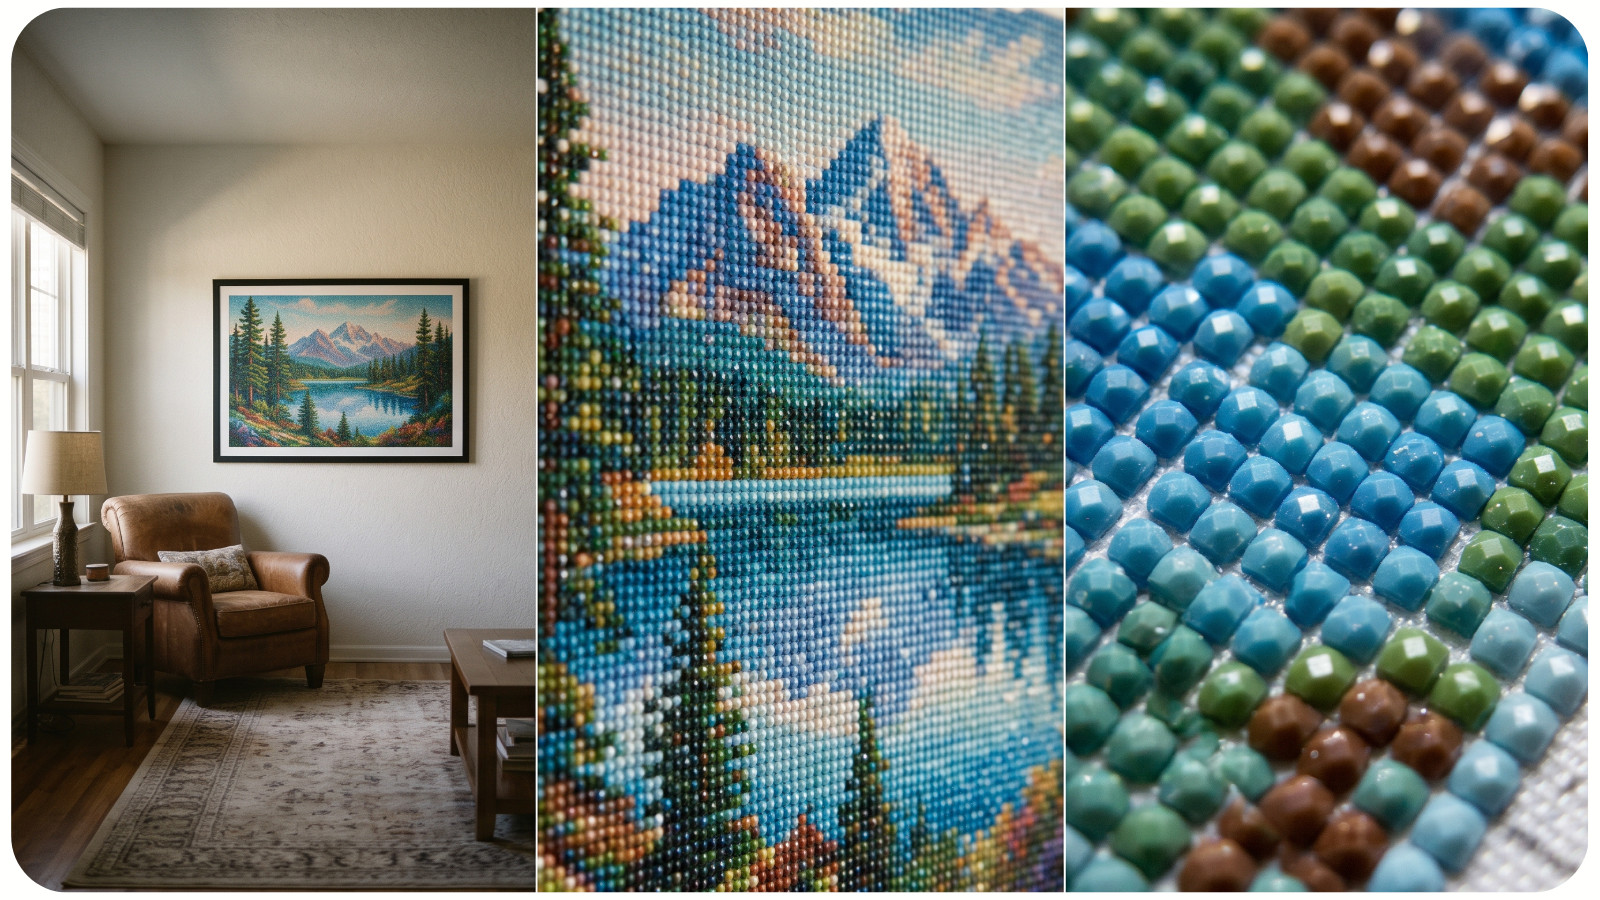
Diamond paintings are designed to be viewed from a distance. When you examine the canvas from only a few inches away, you see individual drills, small gaps, symbol lines, color blocks, and slight alignment differences. Your eyes focus on the grid rather than the image.
Step back several feet and the visual system blends those drills together. Hard color transitions appear softer, facial features become more natural, and isolated drills begin to function like highlights or shadows.
This effect is called optical mixing. It is also used in mosaics, pointillist paintings, printed photographs, and digital displays.
A useful evaluation method is to place the canvas upright, illuminate it evenly, and view it from the distance at which it will normally be displayed.
6. SQUARE AND ROUND DRILLS PRODUCE DIFFERENT RESULTS
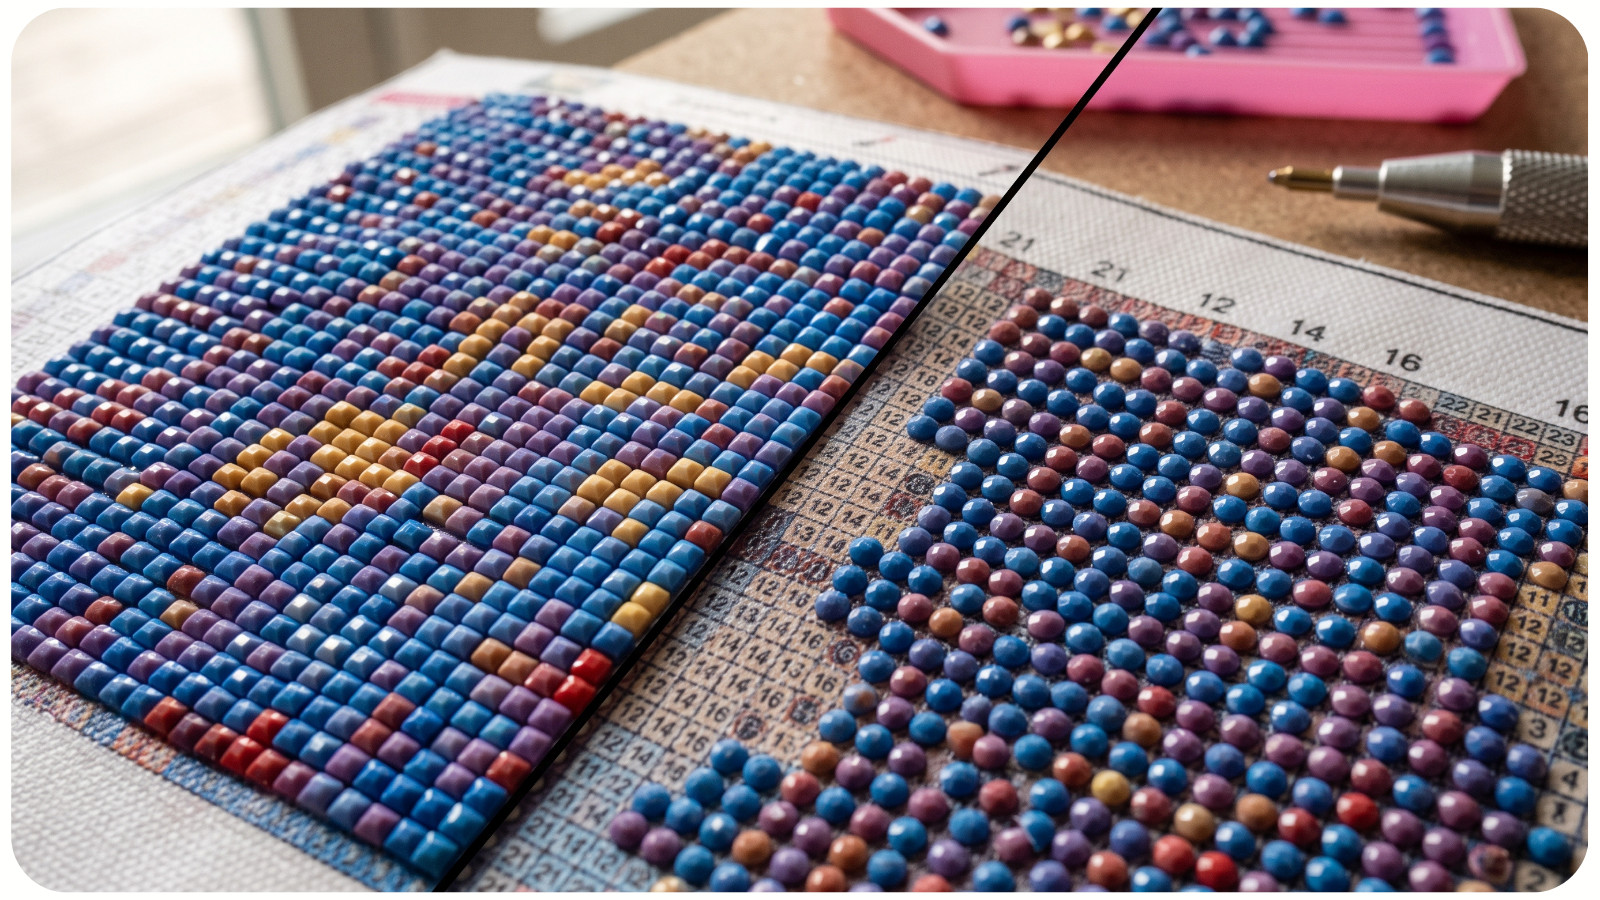
Drill shape changes both the texture and perceived sharpness of the finished image.
Square Drills. Square drills fit edge to edge, creating a dense mosaic surface. Because there are fewer visible gaps, outlines and geometric details may appear more defined.
However, square drills require accurate placement. Misaligned rows can create pressure across the canvas, causing drills to lift or pop.
Round Drills. Round drills are often easier and faster to place. Their faceted tops create a sparkling effect, but the small spaces between drills allow more of the printed canvas to remain visible.
From close range, those spaces may make the image look less solid. From a normal display distance, the colors usually blend more effectively.
Neither shape is automatically better. Square drills often emphasize crispness, while round drills emphasize sparkle and ease of placement.
7. PLACEMENT ACCURACY AFFECTS VISUAL CLARITY
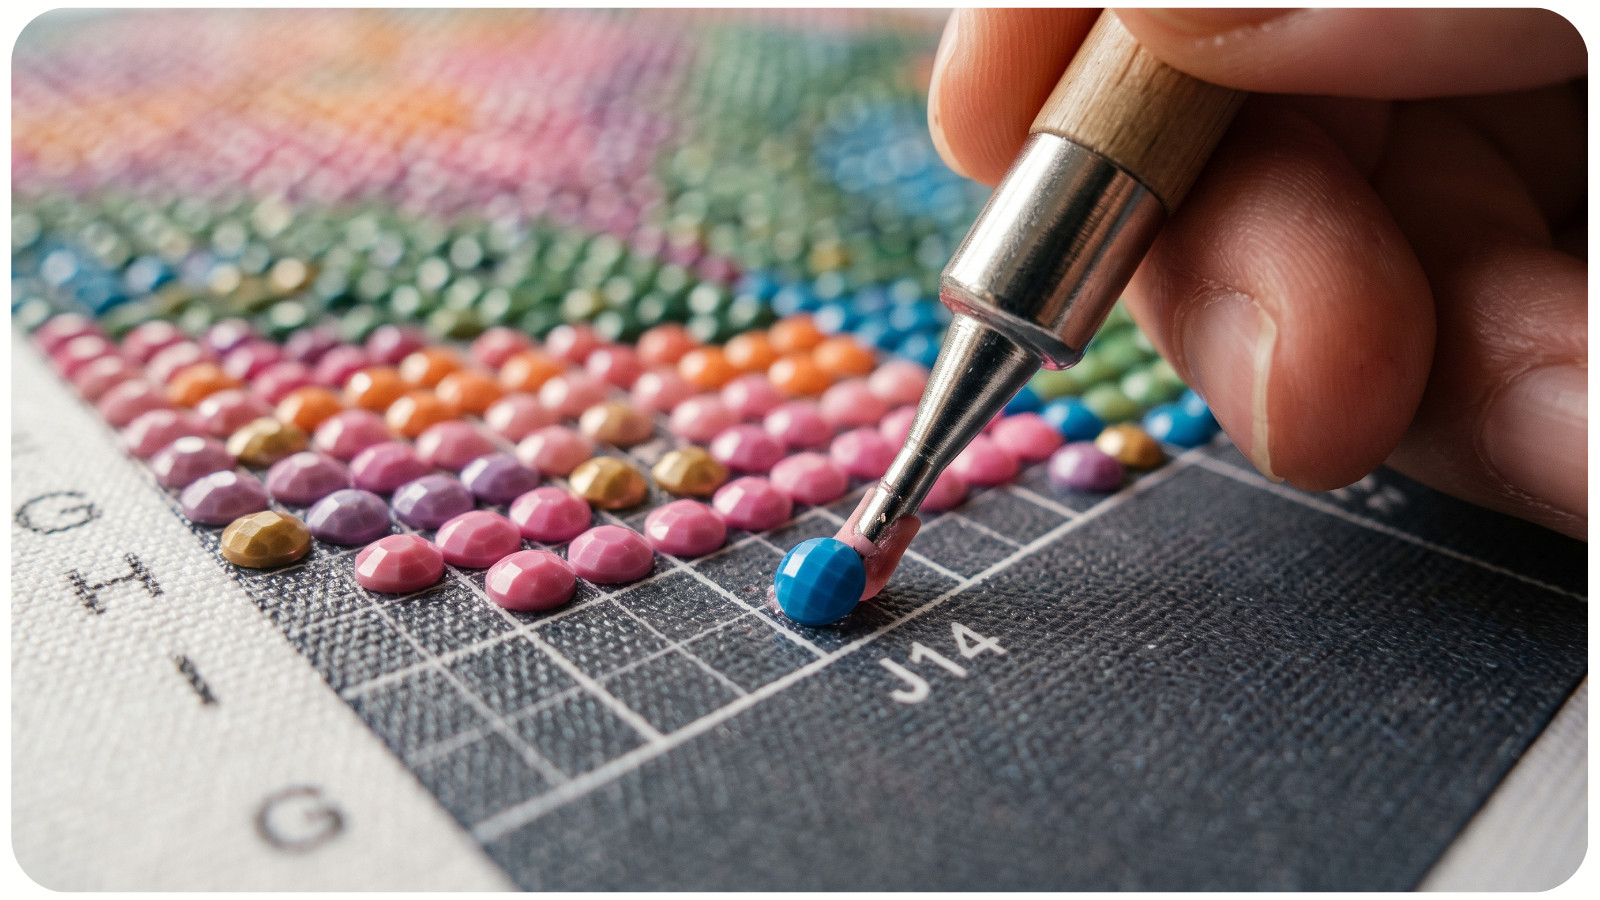
Minor placement errors accumulate across a large canvas. A single slightly crooked drill may not matter. Hundreds of uneven drills can disrupt straight edges, create irregular gaps, and make detailed sections appear less precise.
For better alignment:
- Work in small sections.
- Place the first drills carefully along a straight reference line.
- Avoid forcing drills into gaps that are too narrow.
- Use a straightening tool before the adhesive fully settles.
- Check rows from multiple angles.
- Remove damaged, undersized, or irregular drills.
Multiplacers are useful for large blocks of color, but they can introduce curved or uneven rows when used too quickly. For faces, lettering, and detailed focal points, single placement may produce a cleaner result.
8. POPPING DRILLS CAN DISTORT THE IMAGE
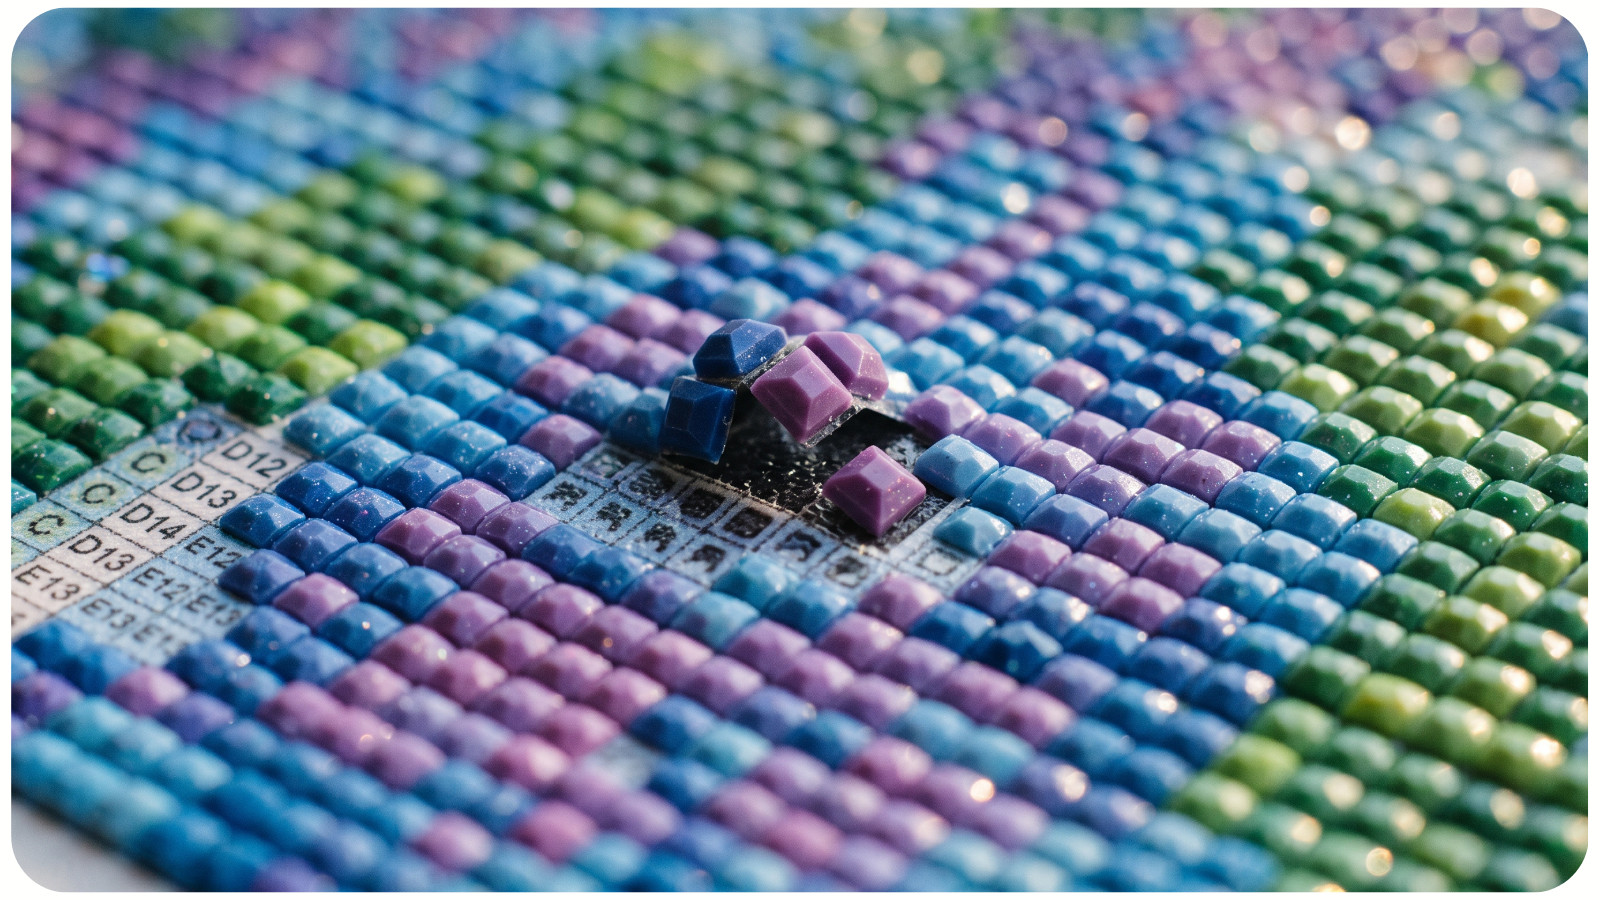
Popping drills are not only an adhesive problem. They can also affect image quality.
When square drills are packed too tightly, pressure builds across the grid. Drills may tilt, lift, or overlap neighboring pieces. This changes the direction of reflected light and makes the surface appear uneven.
Common causes include:
- Drills that are slightly oversized;
- Inconsistent grid spacing;
- Crooked placement;
- Debris between drills;
- Excessive pressure from a roller;
- Canvas expansion or contraction;
- Tight framing without enough clearance.
Do not repeatedly press a popping drill into place without checking the surrounding area. Remove the drill, inspect the gap, straighten neighboring rows, and replace any irregular pieces.
9. CREASES AND SURFACE DISTORTION CHANGE LIGHT REFLECTION
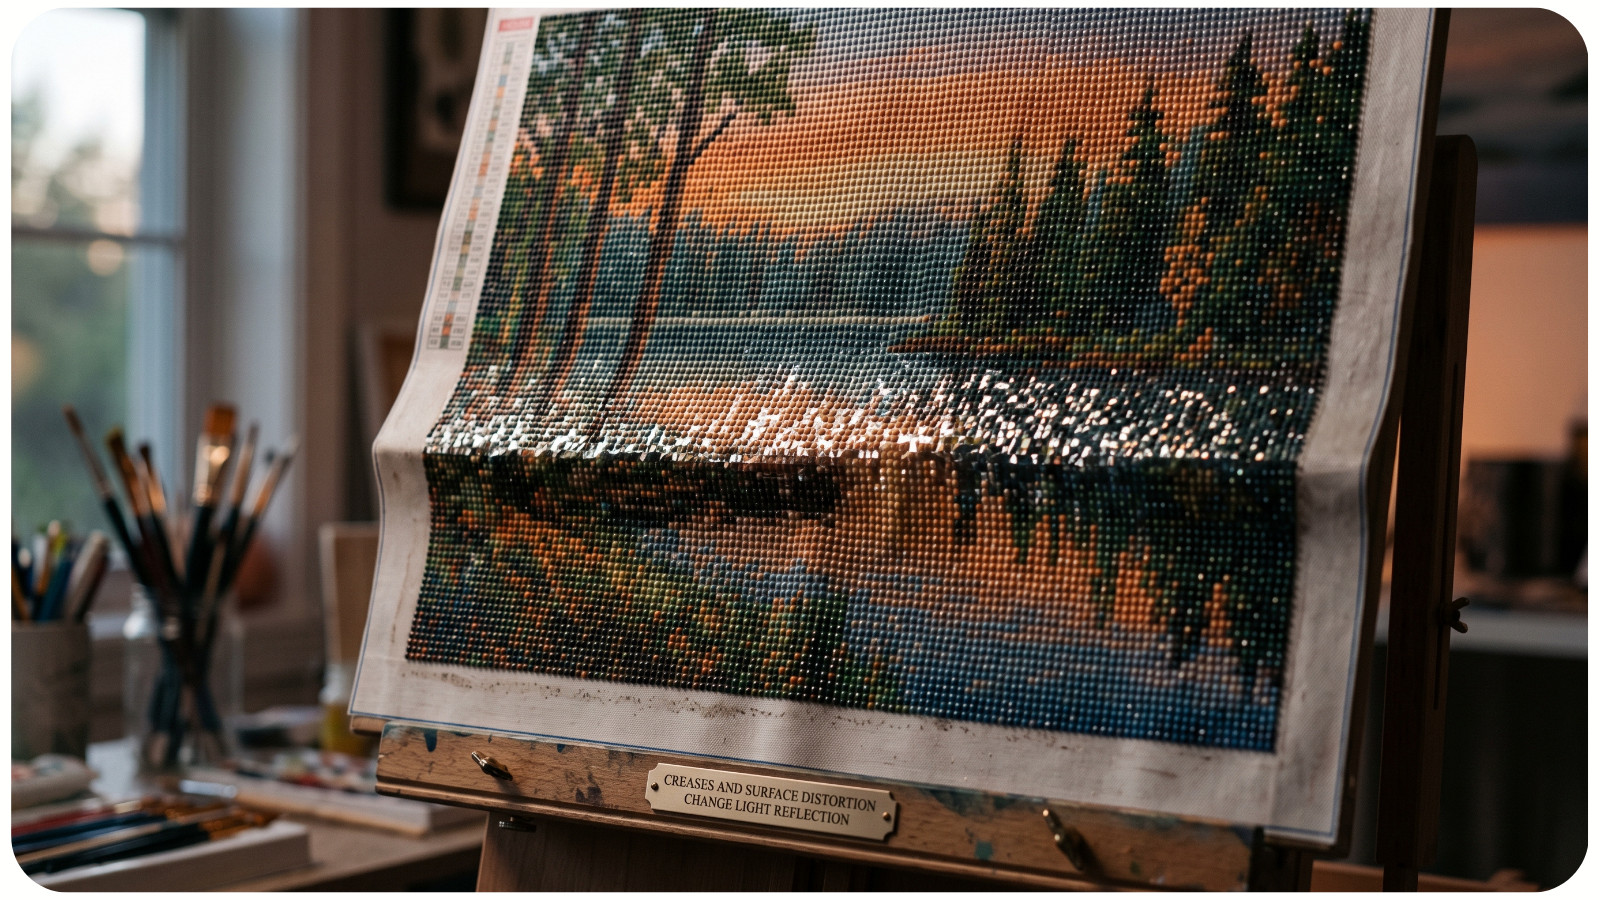
A creased canvas can make an otherwise accurate image look warped. Even when the crease does not pass through the printed design, it may lift drills at slightly different angles. Facets then reflect light unevenly, creating bright or dark bands across the artwork.
Flatten the canvas before beginning. Store it under clean, even weight or reverse-roll it carefully if the manufacturer’s materials allow it. Avoid aggressive heat, which may damage the adhesive or printed symbols.
After completion, mount the canvas on a flat surface before judging its final appearance.
10. SOME IMAGES ARE POOR CANDIDATES FOR SMALL CANVASES
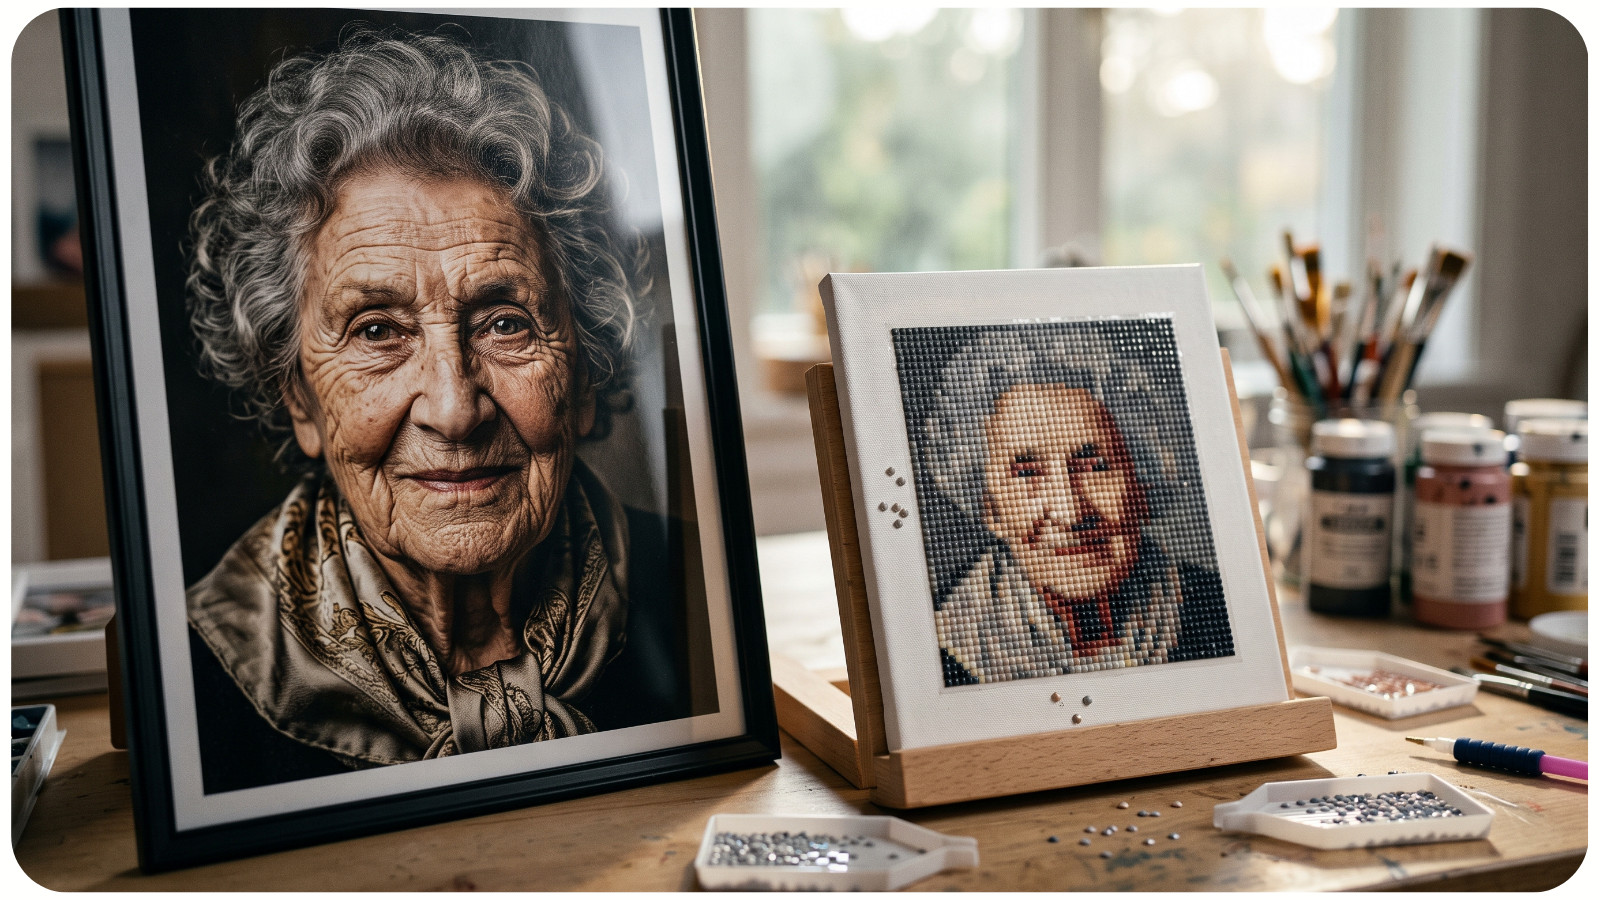
Not every photograph converts successfully into diamond painting.
Images that are especially difficult include:
- Group portraits;
- Dark photographs with limited contrast;
- Subjects with detailed facial expressions;
- Fine text or lettering;
- Busy backgrounds;
- Tiny animals or objects;
- Soft watercolor artwork;
- Images with many similar neutral tones.
The best small-canvas designs usually have a strong central subject, clear outlines, controlled color areas, and strong separation between foreground and background.
For detailed wall decor, choose designs from Awesome Pattern Studio that remain visually readable at the offered canvas size. A thoughtfully selected design can produce a stronger finished result than a highly complex image compressed into an undersized grid.
11. MISSING OR INCORRECT DRILLS CAN CREATE NOTICEABLE COLOR ERRORS
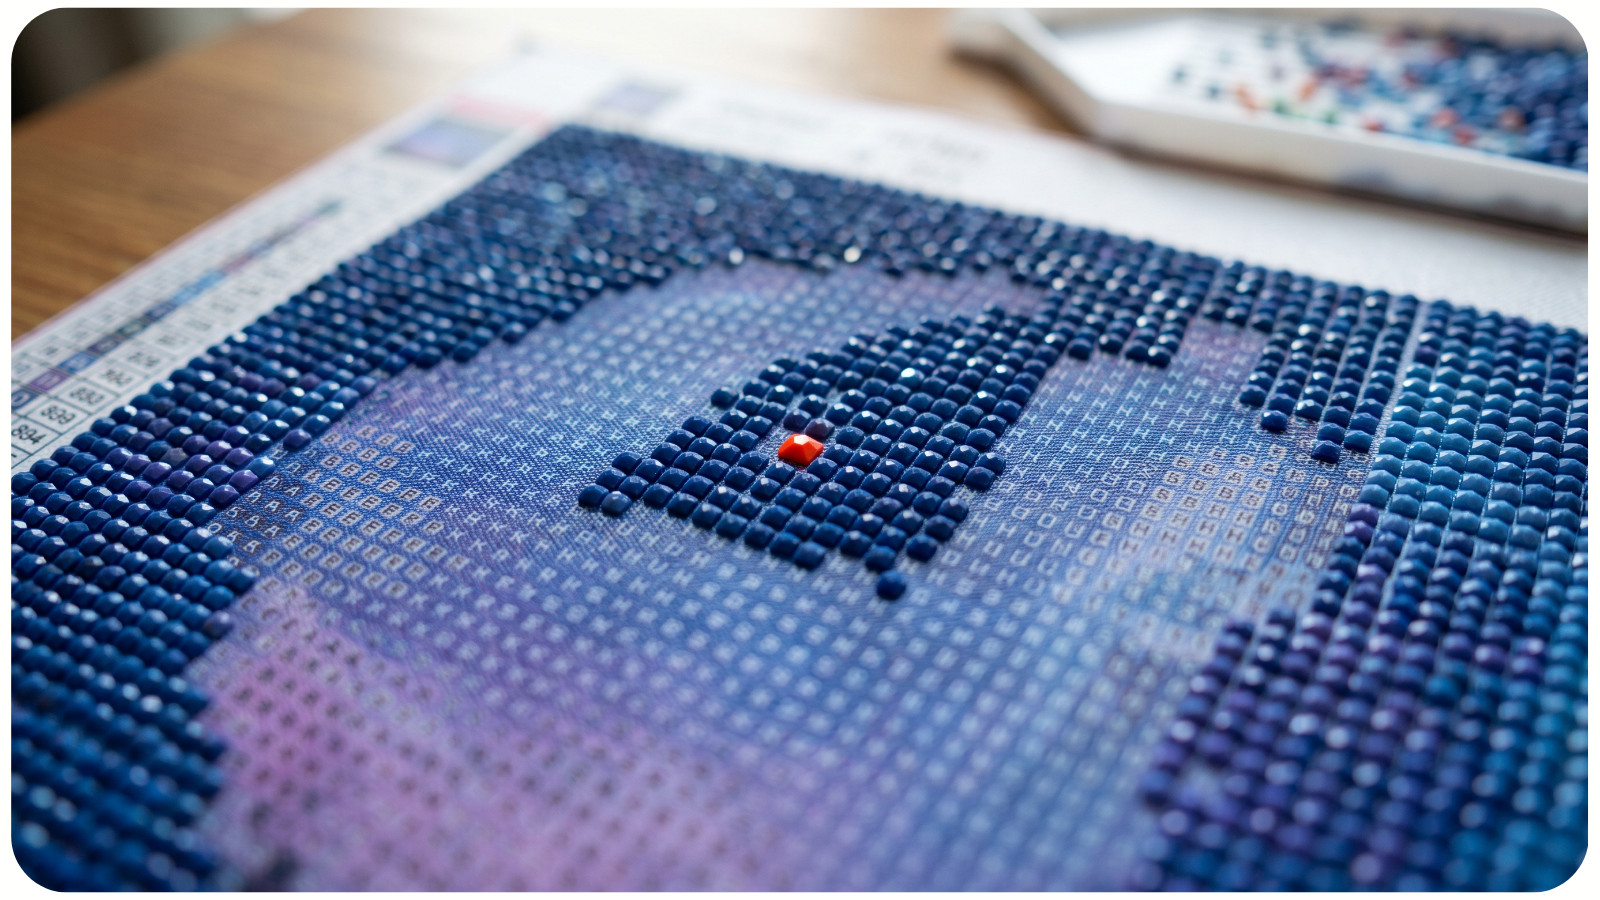
Occasionally, the canvas does not match the preview because the wrong drill color was packed, a symbol was misread, or neighboring colors were accidentally mixed.
Check suspicious areas systematically:
- Compare the symbol with the legend.
- Confirm the bag number or color code.
- Inspect the drills under neutral lighting.
- Compare the area with neighboring sections.
- Replace obviously incorrect drills before sealing or framing.
Dark navy, black, charcoal, deep brown, and dark purple can look nearly identical under warm indoor lighting. A bright work lamp or light pad can reduce sorting errors.
12. SPARKLE CAN TEMPORARILY HIDE THE PICTURE
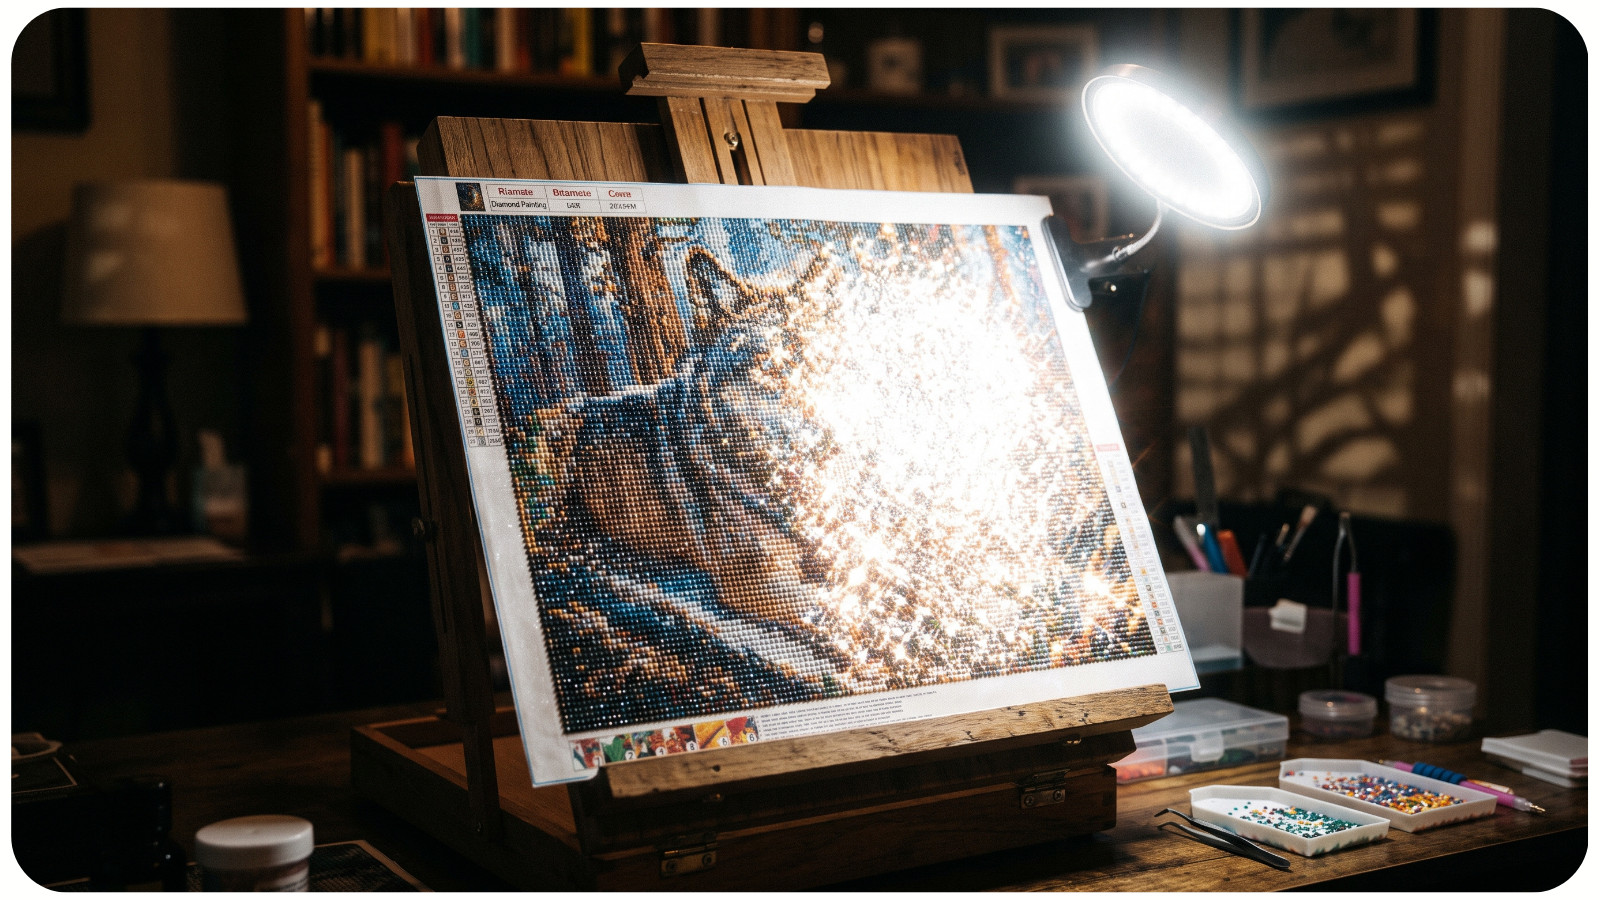
Diamond painting is designed to interact with light, but intense reflections can make the underlying image harder to see.
When light hits the canvas directly, many facets produce bright highlights at once. This is satisfying and visually dramatic, but it may reduce the apparent contrast of the design.
To evaluate image accuracy, look at the canvas under diffused light. To enjoy maximum sparkle, use directional light from the side. The ideal display location provides enough illumination to activate the facets without creating harsh glare.
HOW TO CHOOSE A KIT THAT MATCHES ITS PREVIEW MORE CLOSELY
Before purchasing, examine the complexity of the artwork and the proposed canvas dimensions. Look for completed-project photographs, chart previews, or customer images.
Pay special attention to:
- Facial clarity;
- Background detail;
- Color separation;
- Readability of small objects;
- Number of subjects;
- Canvas dimensions;
- Drill shape;
- Full-drill versus partial-drill coverage.
Avoid judging quality by color count alone. More colors do not automatically create a better image. Accurate rendering depends on how those colors are distributed and whether they preserve important forms.
Awesome Pattern Studio designs can be used as eye-catching home decor, but the final effect depends on selecting an appropriate size, placing drills accurately, and displaying the piece under suitable lighting.
CONCLUSION
A diamond painting will rarely look identical to its original digital photo because it is a physical mosaic built from a limited grid and a fixed drill palette. Canvas size, chart rendering, color conversion, drill shape, lighting, alignment, and viewing distance all influence the final appearance.
Before assuming the kit is defective, mount the canvas flat, inspect it under neutral light, and view it from several feet away. The image may look dramatically clearer once your eyes blend the individual drills into a complete picture.
Which factor has made the biggest difference in your diamond paintings: canvas size, drill shape, lighting, or viewing distance?