


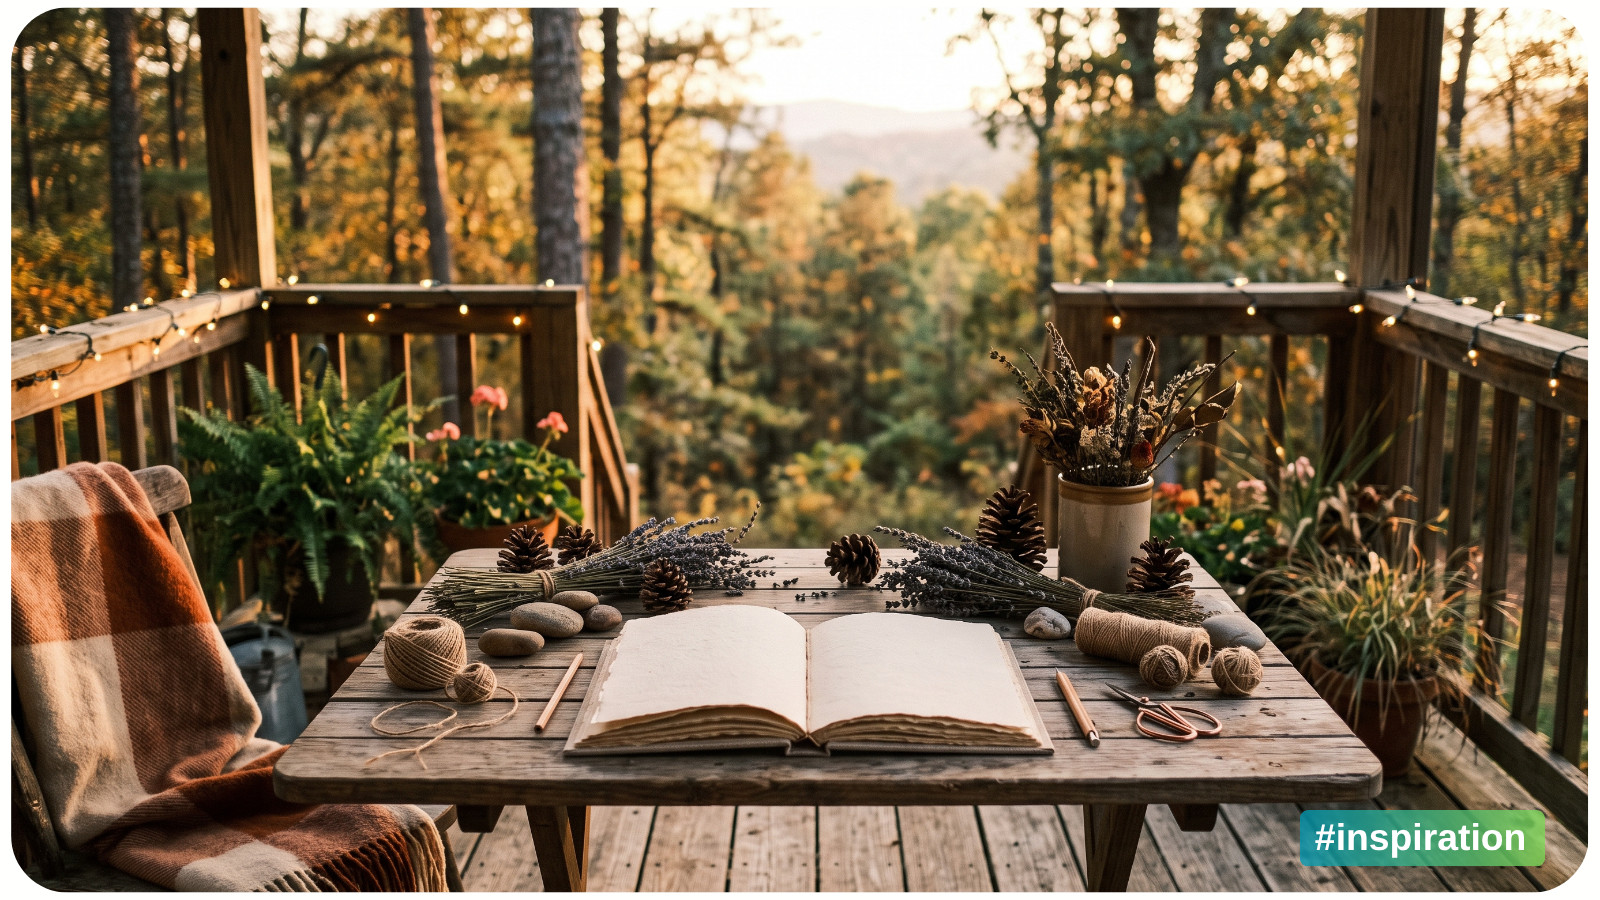
Nature offers an endless supply of creative inspiration. Fresh flowers, smooth stones, colorful leaves, pinecones, twigs, and dried grasses can all become beautiful handmade decorations with just a few basic craft supplies.
These nature-inspired crafts are designed for beginners, families, and anyone who enjoys warm, rustic home decor. Some projects use materials collected outdoors, while others recreate natural textures and colors using easy-to-find supplies from a craft store.
The collection is organized by season, making it simple to find a project for spring decorating, summer crafting, fall gatherings, or cozy winter afternoons. Before collecting natural materials, make sure gathering is allowed in your area, avoid protected plants, and leave enough behind for wildlife.
SPRING NATURE CRAFTS
Spring is the perfect time to craft with flowers, soft colors, fresh greenery, and delicate natural details. These projects celebrate the season’s sense of renewal while adding a light rustic touch to your home.
1. PRESSED-FLOWER PICTURE FRAMES
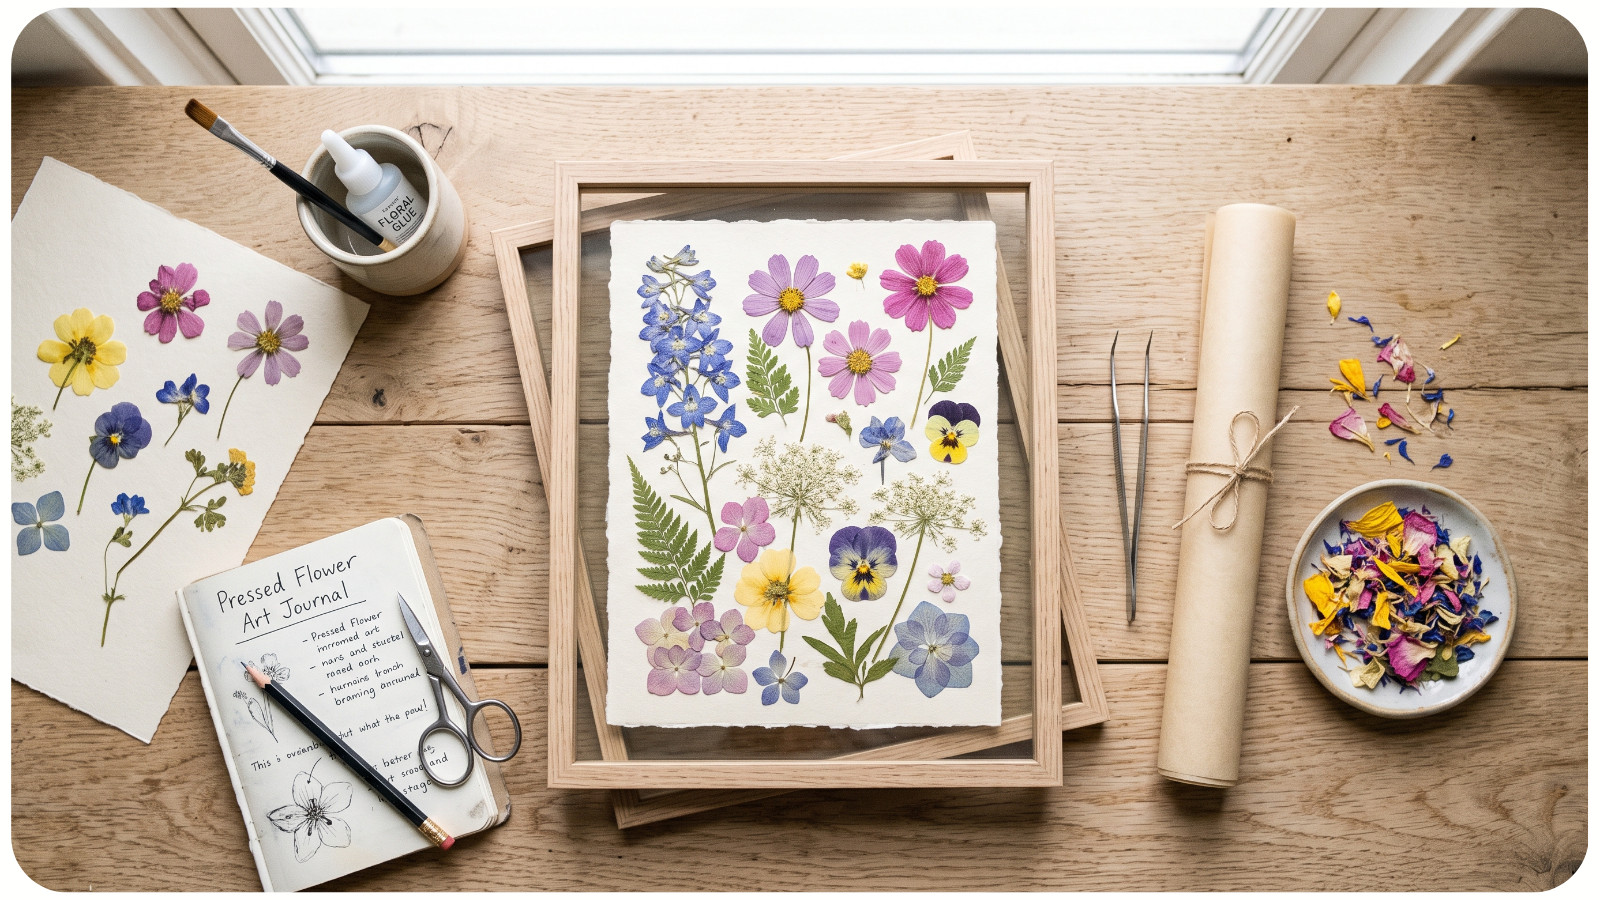
Pressed-flower frames are an easy way to preserve spring blooms and create personalized botanical art. They look beautiful on a mantel, bookshelf, gallery wall, or bedside table.
Supplies:
- Small flowers and leaves;
- Heavy books;
- Parchment paper;
- A glass picture frame;
- Tweezers;
- Clear-drying craft glue.
How to Make It: Place clean, dry flowers between two sheets of parchment paper. Tuck them inside a heavy book, then add more books on top. Allow the flowers to press for one to two weeks.
Once the flowers are completely flat and dry, arrange them on the glass or backing of your frame. Use tweezers to adjust small petals and leaves. Add tiny dots of glue to hold the arrangement in place, then assemble the frame.
Rustic Styling Tip: Choose wildflowers, ferns, or small leafy stems and display them in a simple wood frame. Neutral backgrounds such as cream, linen, or kraft paper will give the finished craft a warm farmhouse look.
2. TWIG-WRAPPED MINI PLANTERS
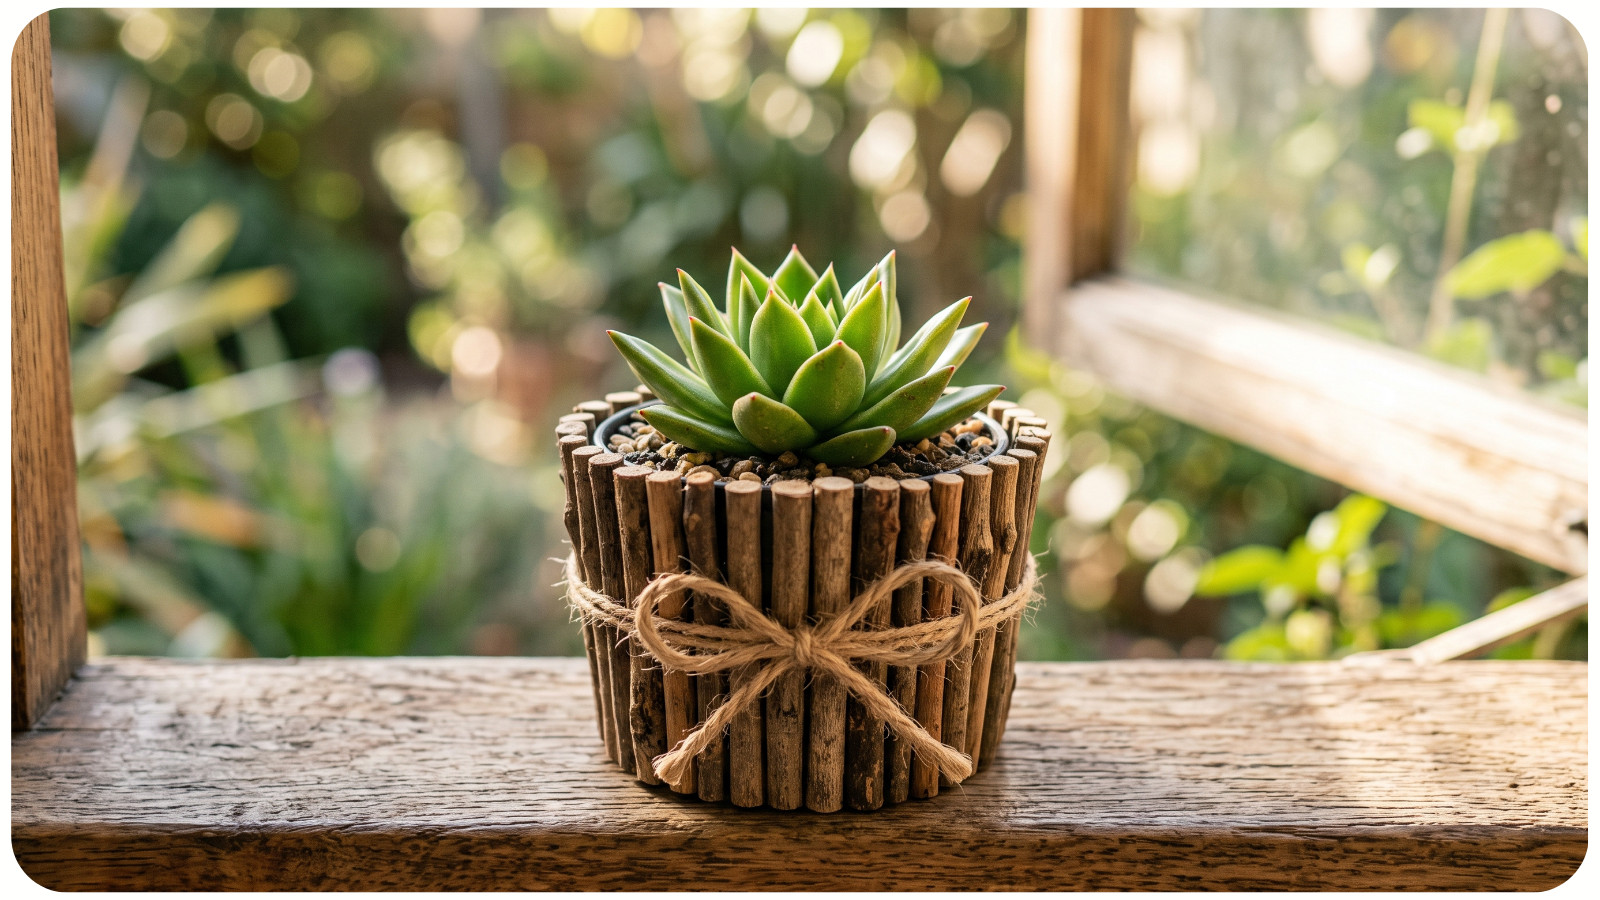
Turn basic plant pots into rustic spring decorations using small twigs gathered from your yard. These textured planters are perfect for herbs, succulents, or small flowering plants.
Supplies:
- Small terracotta pots or clean tin cans;
- Straight twigs;
- Garden shears;
- Hot glue gun;
- Jute twine;
- Small plants or herbs.
How to Make It: Cut the twigs into pieces that match the height of your planter. Glue them vertically around the outside, placing each twig close to the next.
Wrap jute twine around the center of the planter several times and tie it into a knot or bow. Add your plant after the glue has cooled.
Beginner Tip: Choose twigs with similar thicknesses for a tidy finish. For a more natural woodland look, mix slightly different shapes and shades.
3. BOTANICAL CLAY TRINKET DISHES
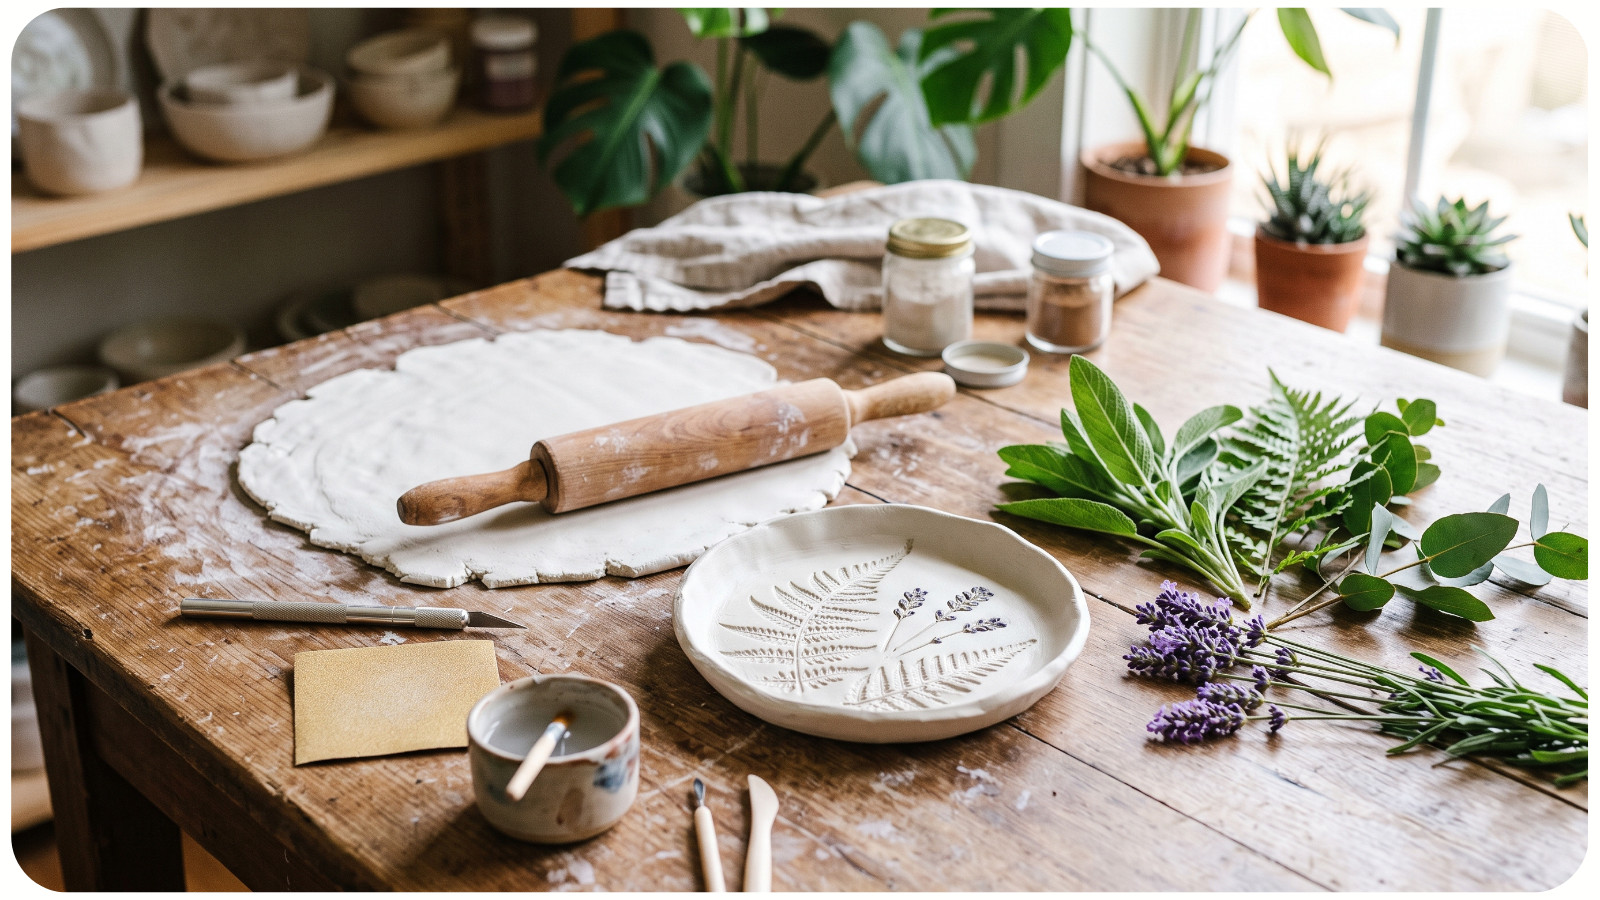
Air-dry clay makes it easy to capture the texture of spring leaves and flowers. These handmade dishes can hold rings, keys, paper clips, or other small items.
Supplies:
- Air-dry clay;
- Rolling pin;
- Fresh leaves or flowers;
- Small bowl;
- Craft knife;
- Fine-grit sandpaper;
- Acrylic paint or clear sealer.
How to Make It: Roll the clay into a flat circle about one-quarter inch thick. Place a leaf or flower on the surface and gently roll over it to create an imprint.
Remove the plant material carefully. Cut the clay into a circle or organic shape, then place it inside a shallow bowl so the edges curve upward as it dries.
Once dry, sand rough edges. Leave the dish natural or add soft green, cream, blush, or pale blue paint.
Rustic Styling Tip: Apply a light wash of paint rather than a solid coat. This keeps the botanical impression visible and gives the dish a soft, weathered appearance.
SUMMER NATURE CRAFTS
Summer crafts can be bright, relaxed, and inspired by long days outdoors. Seashells, stones, herbs, and wildflowers are especially useful for creating seasonal decorations.
4. PAINTED STONE GARDEN MARKERS
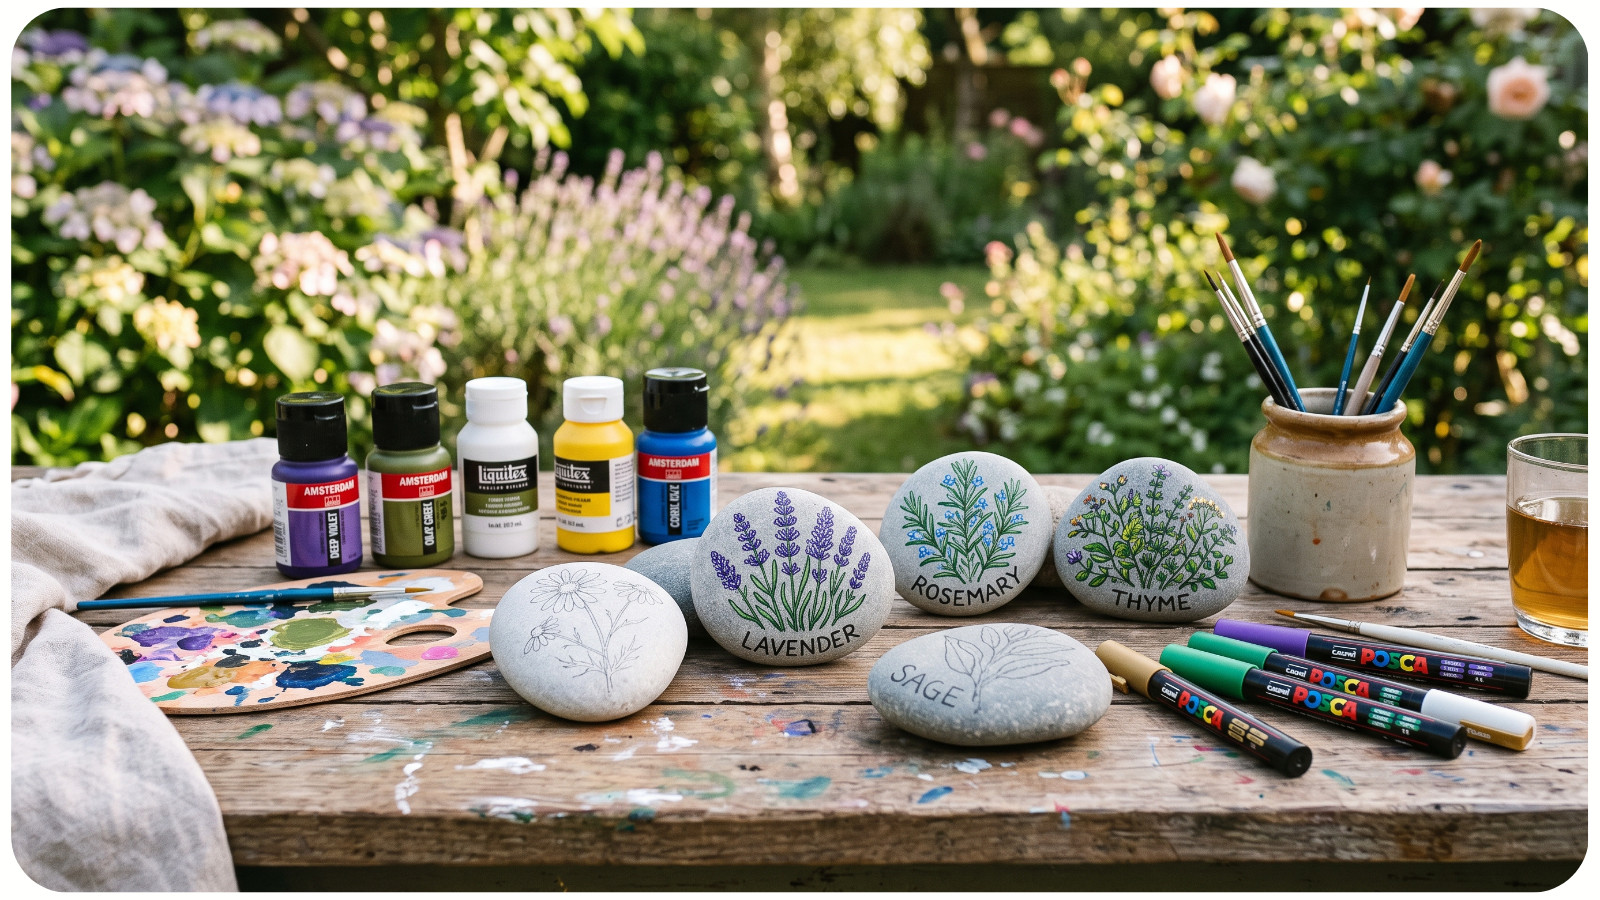
Painted garden markers are practical, colorful, and easy enough for children and adults to make together. Use them to label herbs, vegetables, or flowers in a backyard garden or container garden.
Supplies:
- Smooth flat stones;
- Acrylic paint;
- Small paintbrushes;
- Paint pens;
- Outdoor clear sealer.
How to Make It: Wash the stones and allow them to dry completely. Paint each stone with the name of a plant, such as basil, mint, rosemary, tomatoes, or lavender.
Add simple illustrations including leaves, flowers, bees, or vegetables. When the paint is dry, apply an outdoor sealer to protect the design from rain and sunlight.
Beginner Tip: Sketch the lettering lightly with a pencil before painting. Paint pens are especially helpful for creating clean words and small details.
5. SEASHELL AND DRIFTWOOD GARLAND
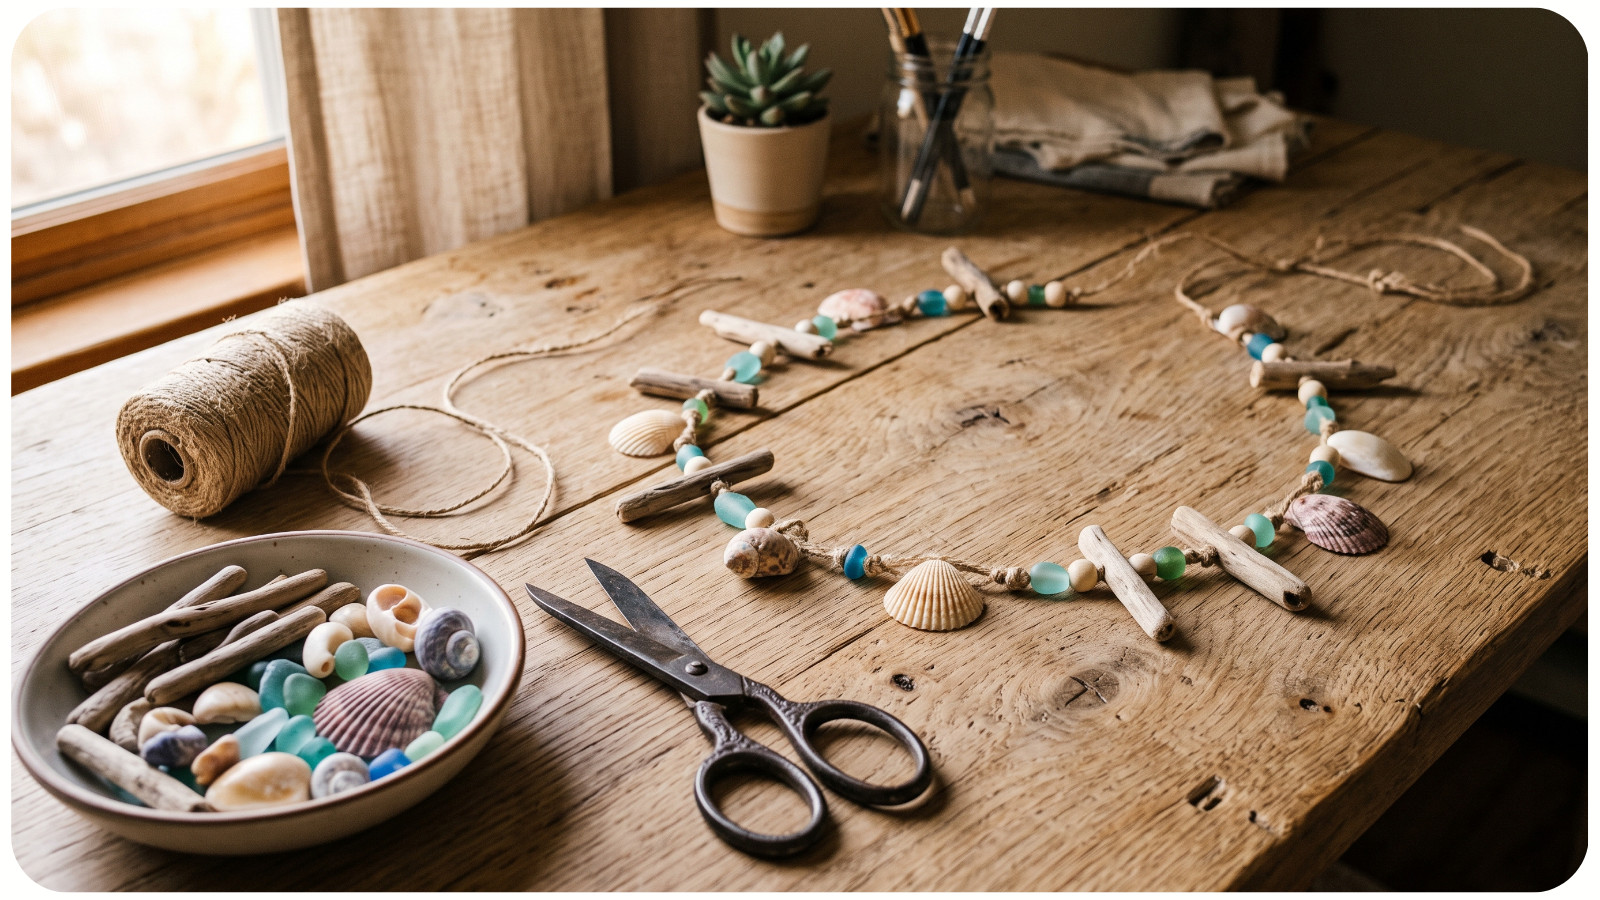
A seashell garland brings a subtle coastal feeling to summer decor without requiring a full beach-themed room. Hang it across a window, mantel, patio wall, or porch shelf.
Supplies:
- Small pieces of driftwood;
- Seashells;
- Jute cord;
- Wooden beads;
- Small drill or strong craft glue;
- Scissors.
How to Make It: Cut a long piece of jute cord. Arrange driftwood, shells, and wooden beads before attaching them so you can plan the spacing.
Drill small holes in sturdy shells when appropriate, or glue shells onto loops of twine. Tie each element to the main cord, leaving a few inches between pieces. Create loops at both ends for hanging.
Rustic Styling Tip: Use natural wood beads and unpainted shells for a neutral garland. For a soft summer accent, add a few pale blue or sea-glass-colored beads.
6. DRIED HERB BUNDLES FOR THE KITCHEN
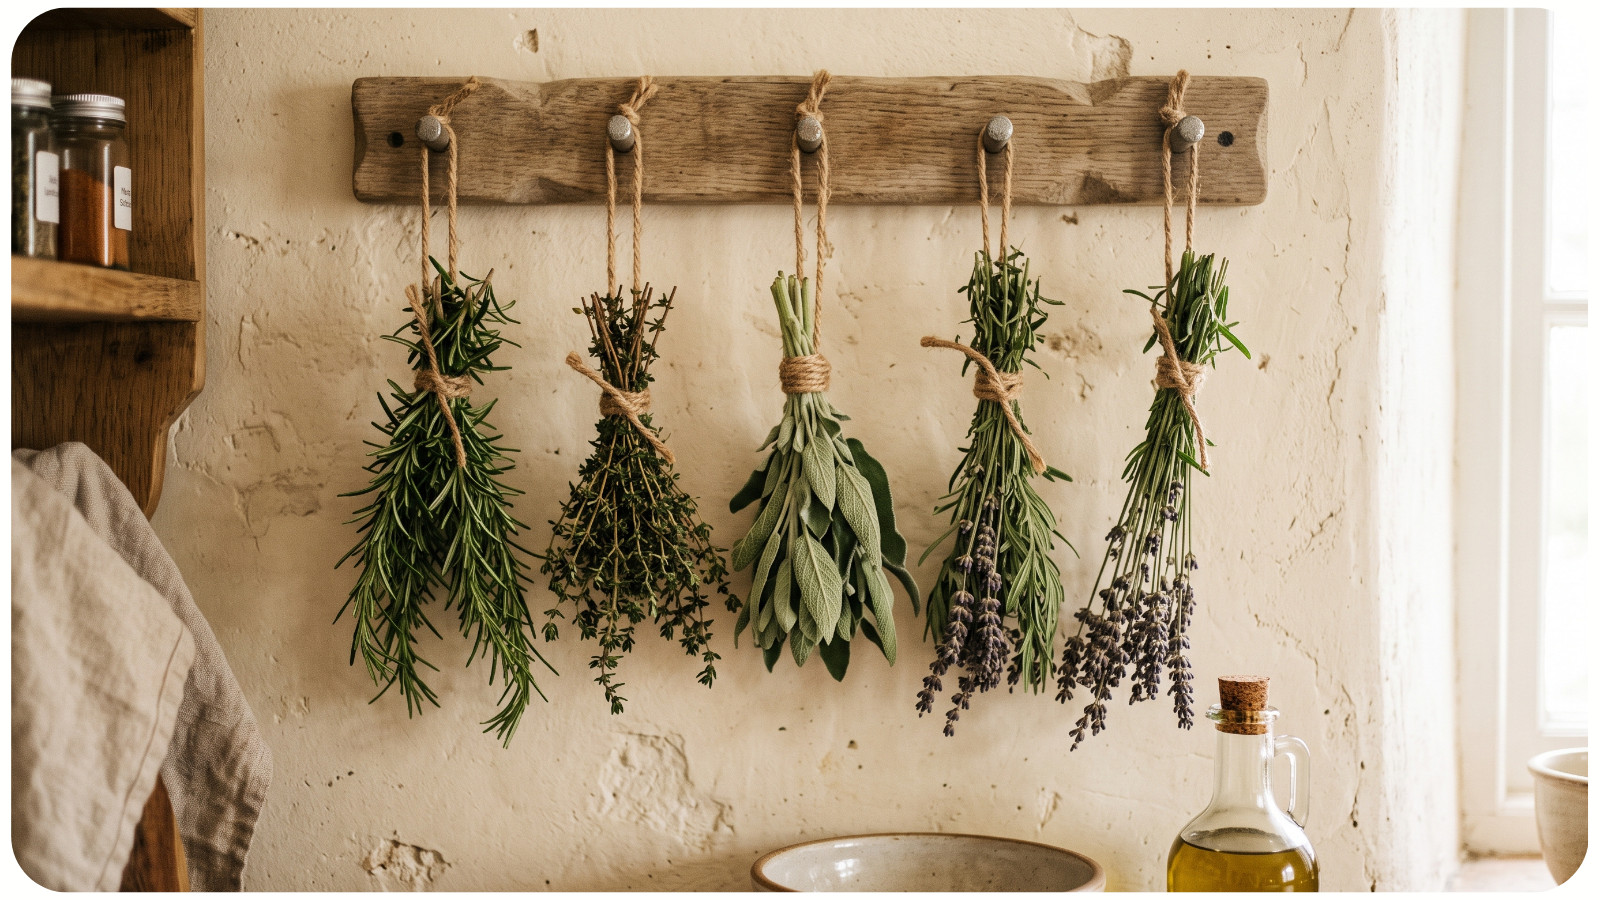
Dried herb bundles are both decorative and useful. They add fragrance and texture to the kitchen while preserving fresh herbs for cooking, tea, or homemade gifts.
Supplies:
- Fresh herbs;
- Cotton string or jute twine;
- Scissors;
- Small hooks or a wooden drying rack;
- Paper bags, if needed.
How to Make It: Gather herbs such as rosemary, thyme, oregano, sage, mint, or lavender. Remove damaged leaves and gently pat away any moisture.
Tie small bundles at the stems and hang them upside down in a dry, well-ventilated place away from direct sunlight. Place a paper bag loosely around herbs that may drop small leaves or seeds.
Once the herbs are completely dry, store them in labeled jars or leave a few bundles hanging as rustic kitchen decor.
Important Tip: Make small bundles rather than thick ones. Air needs to circulate around the herbs to help prevent mold.
FALL NATURE CRAFTS
Autumn provides some of the richest natural craft materials of the year. Colorful leaves, acorns, seed pods, dried grasses, and pinecones are ideal for warm rustic projects.
7. COLORFUL LEAF LANTERNS
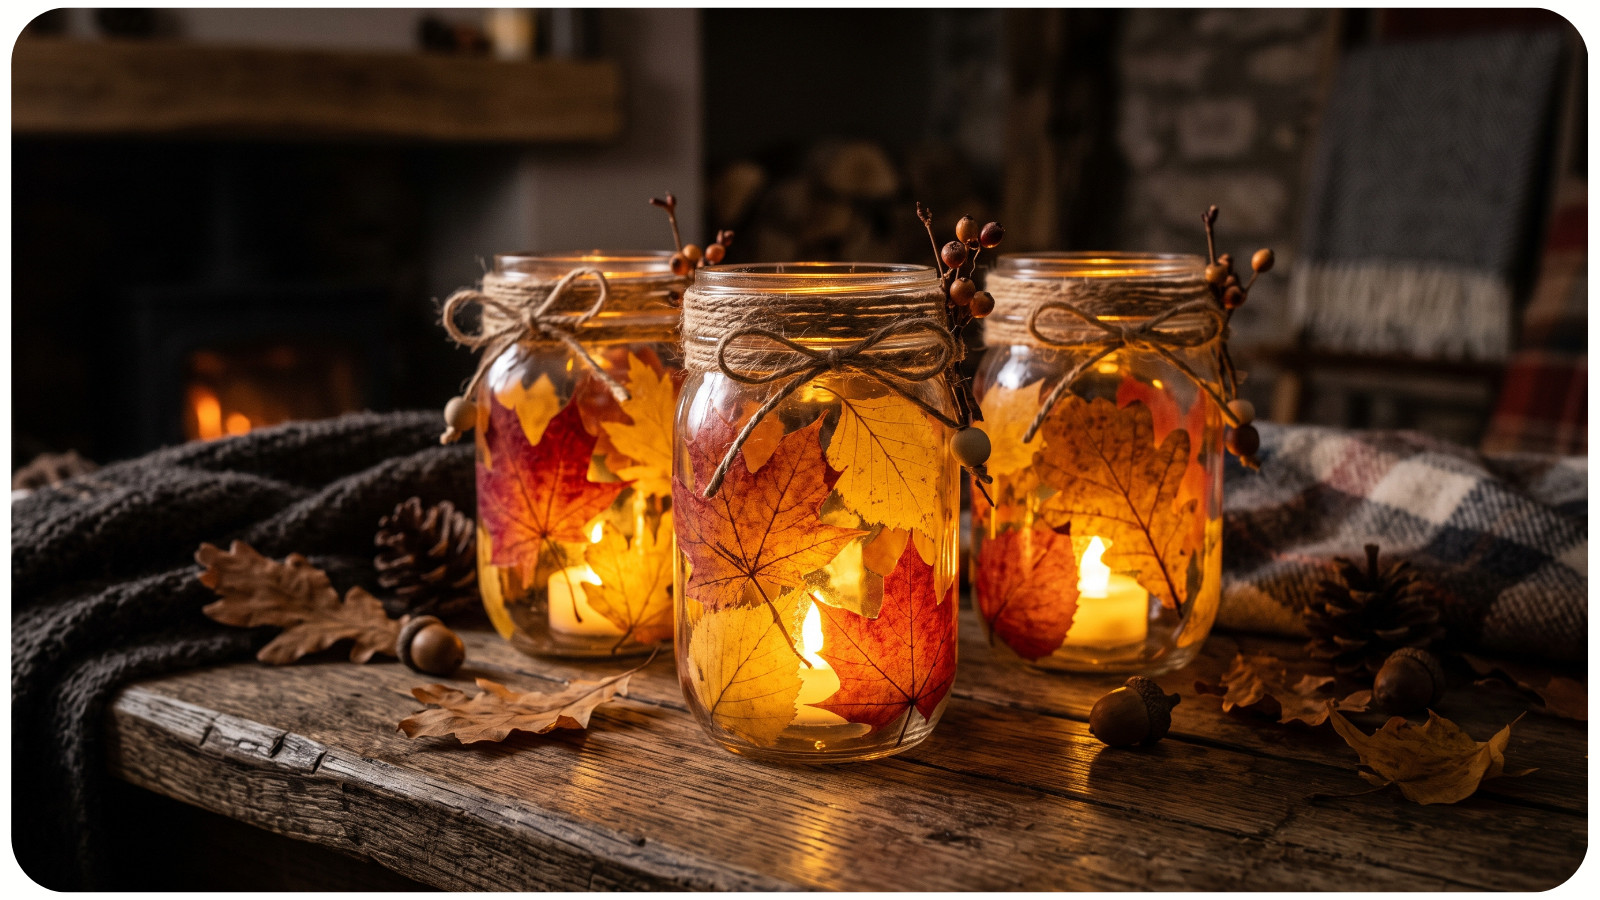
Leaf lanterns create a soft seasonal glow for fall dinners, Thanksgiving tables, or cozy evenings at home. Battery-operated candles make them safer for family crafting.
Supplies:
- Clean glass jars;
- Pressed fall leaves;
- Decoupage glue;
- Foam brush;
- Jute twine;
- Battery-operated tea lights.
How to Make It: Press colorful leaves inside a book for several days so they become flatter and easier to attach.
Brush a thin layer of decoupage glue onto the outside of a clean jar. Place the leaves against the glass and gently smooth them down. Apply another thin layer of glue over the leaves.
Allow the jar to dry, then wrap twine around the rim. Place a battery-operated candle inside.
Beginner Tip: Small, thin leaves work better than thick or curled leaves. Overlapping a few different colors creates a beautiful stained-glass effect.
8. PINECONE AND ACORN TABLE CENTERPIECE
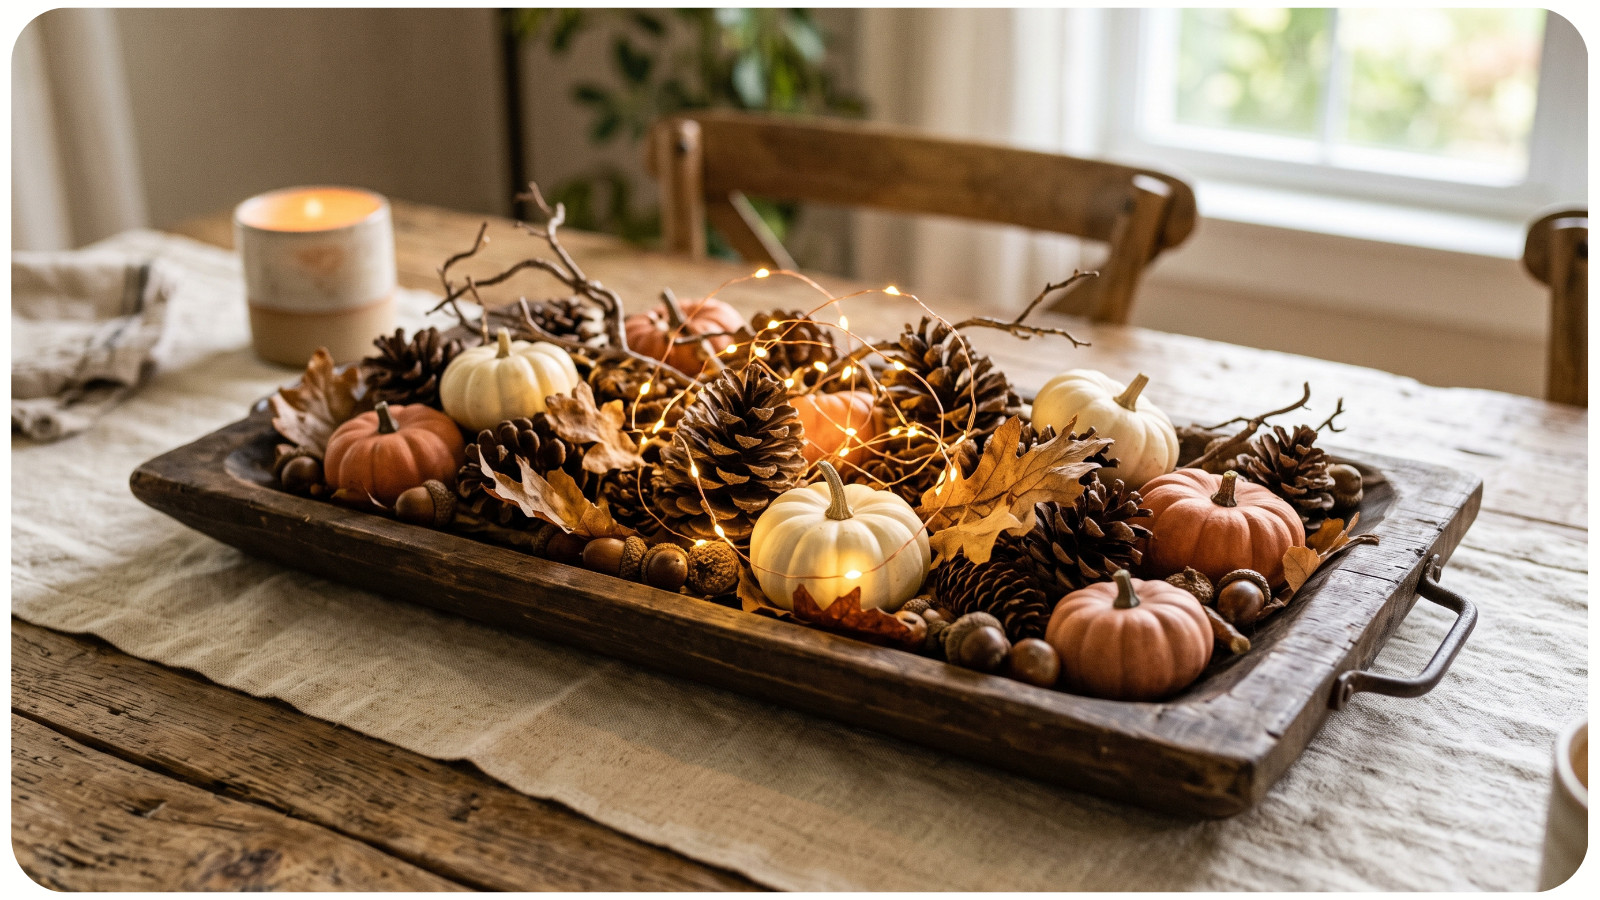
This easy fall centerpiece uses natural textures and neutral colors to create a welcoming display for a dining table, coffee table, or entryway.
Supplies:
- Wooden bowl, tray, or basket;
- Pinecones;
- Acorns;
- Small branches;
- Dried leaves;
- Mini pumpkins;
- Battery-operated string lights.
How to Make It: Start with a shallow wooden container. Add the largest items first, such as pinecones and mini pumpkins. Fill the spaces with acorns, dried leaves, and short pieces of branches.
Weave a strand of battery-operated lights through the arrangement for a warm evening glow.
Rustic Styling Tip: Keep the color palette natural with brown, cream, muted orange, and soft green. A linen table runner will complete the relaxed farmhouse look.
Safety Note: Inspect pinecones, acorns, and branches before bringing them indoors. Brush away dirt and insects, and allow damp materials to dry completely.
9. DRIED GRASS AND WHEAT WALL HANGING
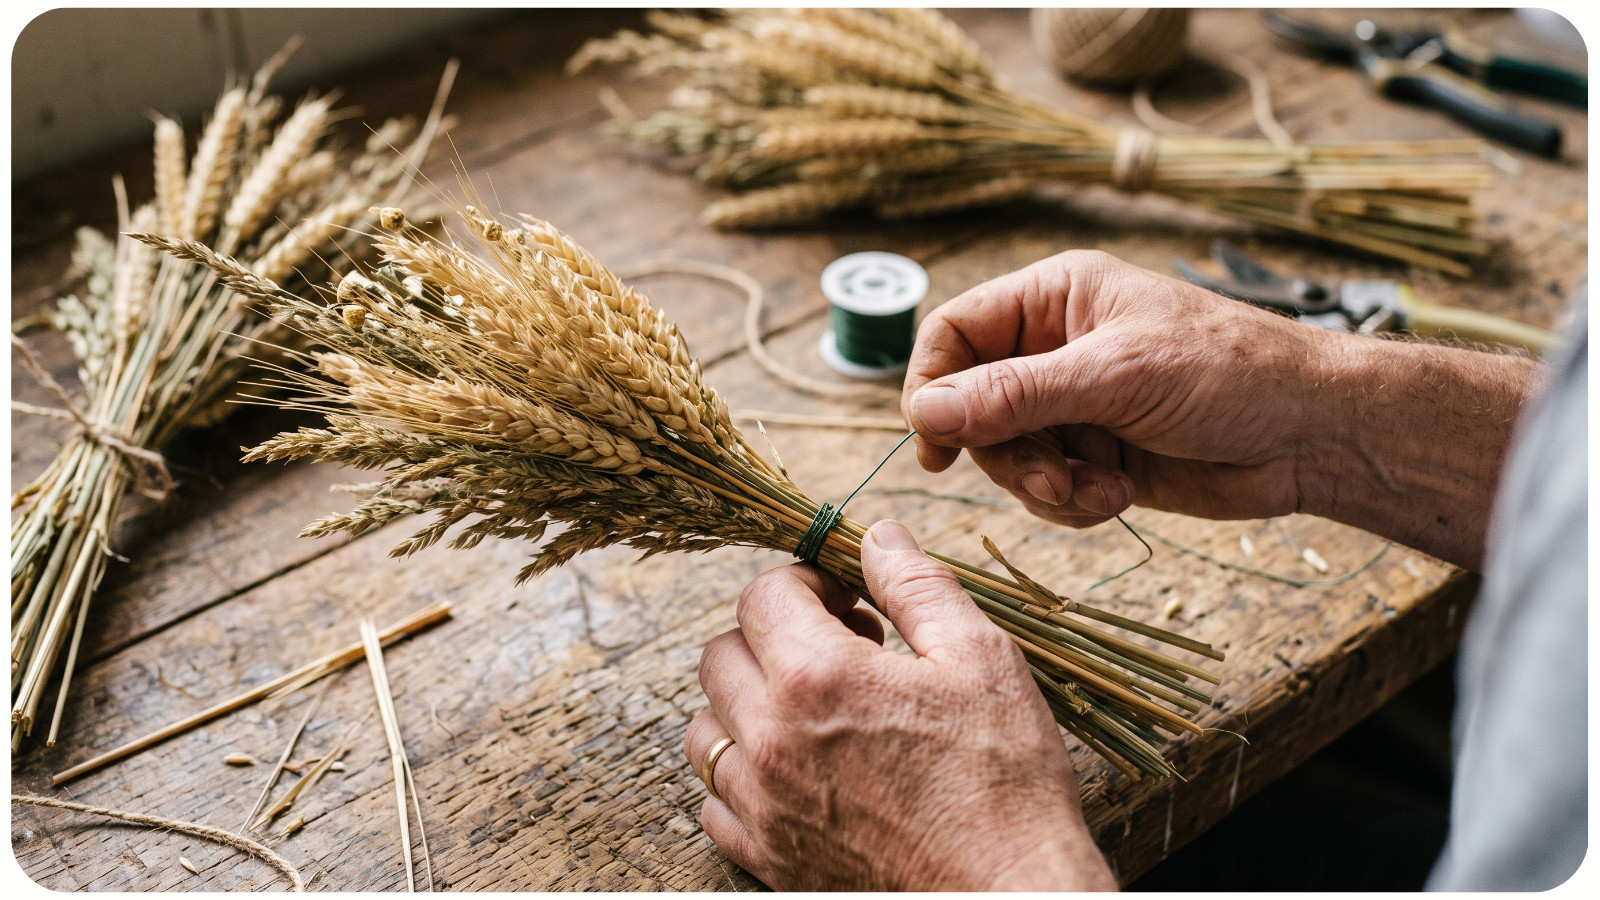
Dried grasses create movement, texture, and a soft golden color that works beautifully in fall decor. This simple wall hanging looks impressive but requires very little crafting experience.
Supplies:
- A sturdy branch or wooden dowel;
- Dried grasses;
- Wheat stems;
- Seed pods;
- Floral wire;
- Jute cord;
- Scissors.
How to Make It: Arrange small bundles of dried grass, wheat, and seed pods. Secure each bundle with floral wire.
Tie or wire the bundles along the branch, allowing some stems to hang lower than others. Attach jute cord to both ends of the branch to create a hanger.
Trim the bottom into a gentle curve or leave the stems uneven for a more organic look.
Beginner Tip: Start with three to five bundles and add more only when needed. Leaving a little open space keeps the wall hanging from looking too heavy.
WINTER NATURE CRAFTS
Winter nature crafts often feature evergreen branches, pinecones, bare twigs, wood slices, and muted colors. These materials bring warmth and texture indoors during the coldest months.
10. PINECONE SNOWY OWLS

Pinecone owls are charming winter decorations and an enjoyable project for families. Display them on shelves, use them as woodland table decor, or attach string to turn them into ornaments.
Supplies:
- Pinecones;
- White and brown felt;
- Small wood circles or felt circles;
- Craft glue;
- Scissors;
- Black beads or a black marker;
- Cotton batting, optional.
How to Make It: Cut two wing shapes, two circles for the eyes, and a small triangle for the beak. Glue the pieces onto the pinecone to create an owl face and body.
Add black beads or marker dots for the pupils. Tuck small pieces of cotton batting between the pinecone scales to create a snowy effect.
Rustic Styling Tip: Use cream, tan, gray, and soft brown felt rather than bright colors. The neutral palette gives the owls a cozy woodland appearance.
11. EVERGREEN AND CINNAMON DOOR SWAG
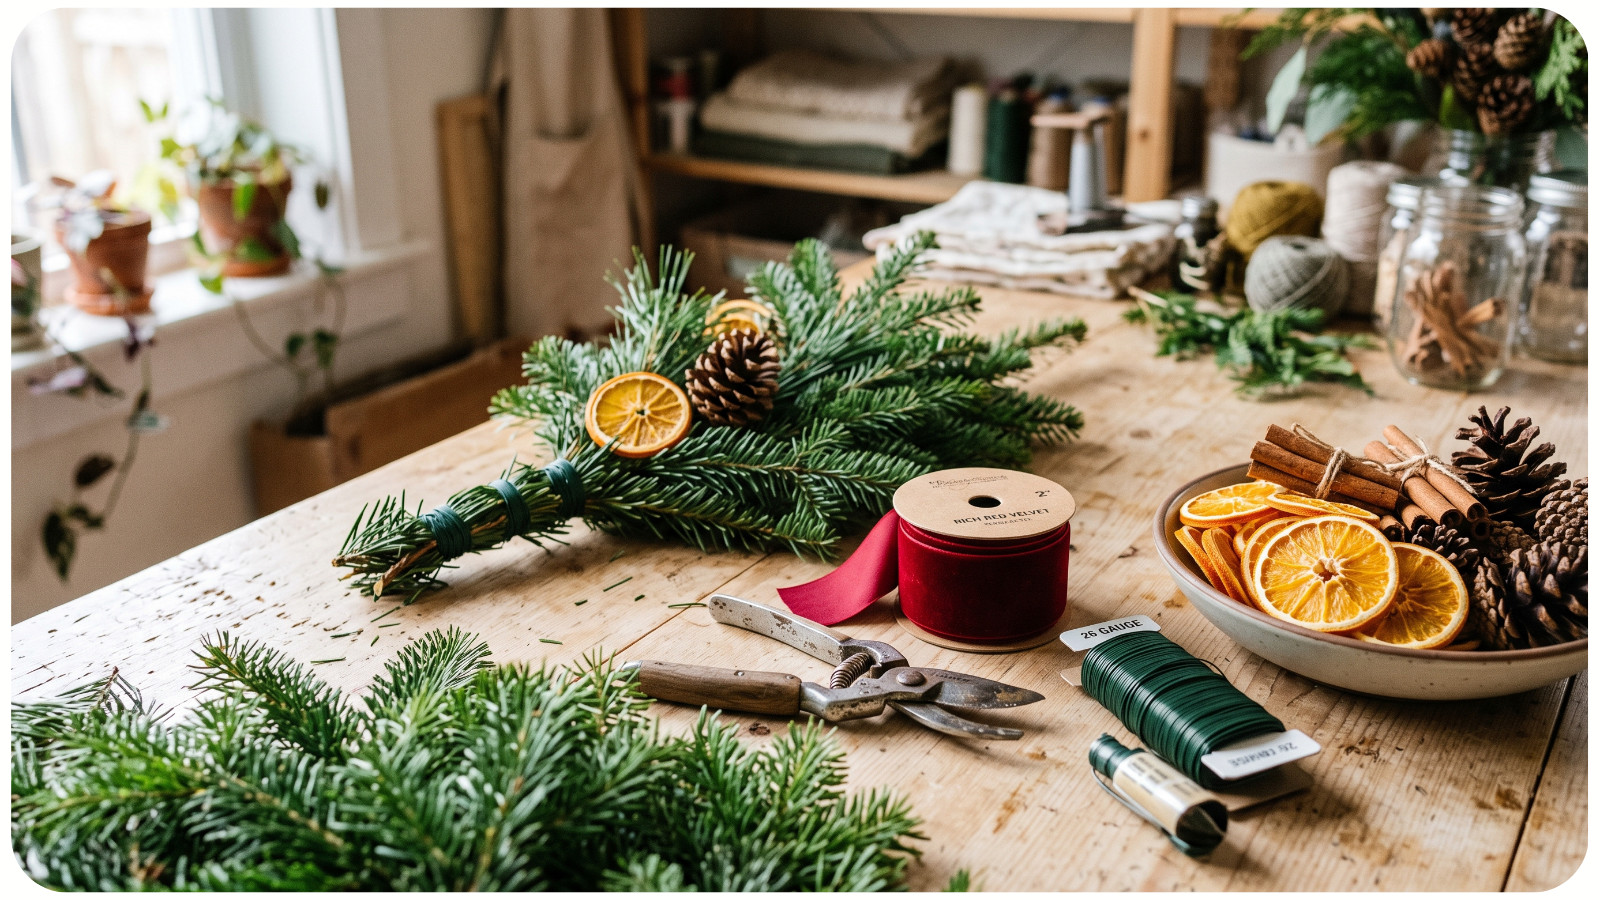
A door swag is often easier to make than a full wreath and can be assembled with fresh or artificial greenery. Cinnamon sticks and dried orange slices add fragrance, color, and traditional winter charm.
Supplies:
- Evergreen branches;
- Floral wire;
- Cinnamon sticks;
- Dried orange slices;
- Pinecones;
- Ribbon;
- Pruning shears.
How to Make It: Layer several evergreen branches so the tips point downward. Wrap floral wire tightly around the stems to secure the bundle.
Attach pinecones, cinnamon sticks, and dried orange slices near the top. Cover the wire with a ribbon bow, then add a loop for hanging.
Beginner Tip: Begin with three sturdy branches, then layer smaller pieces on top. This creates a full shape without making the swag too bulky.
Fresh Greenery Tip: Fresh evergreens may dry out indoors. Keep the swag away from fireplaces, heating vents, and open flames.
12. WOOD-SLICE WINTER ORNAMENTS
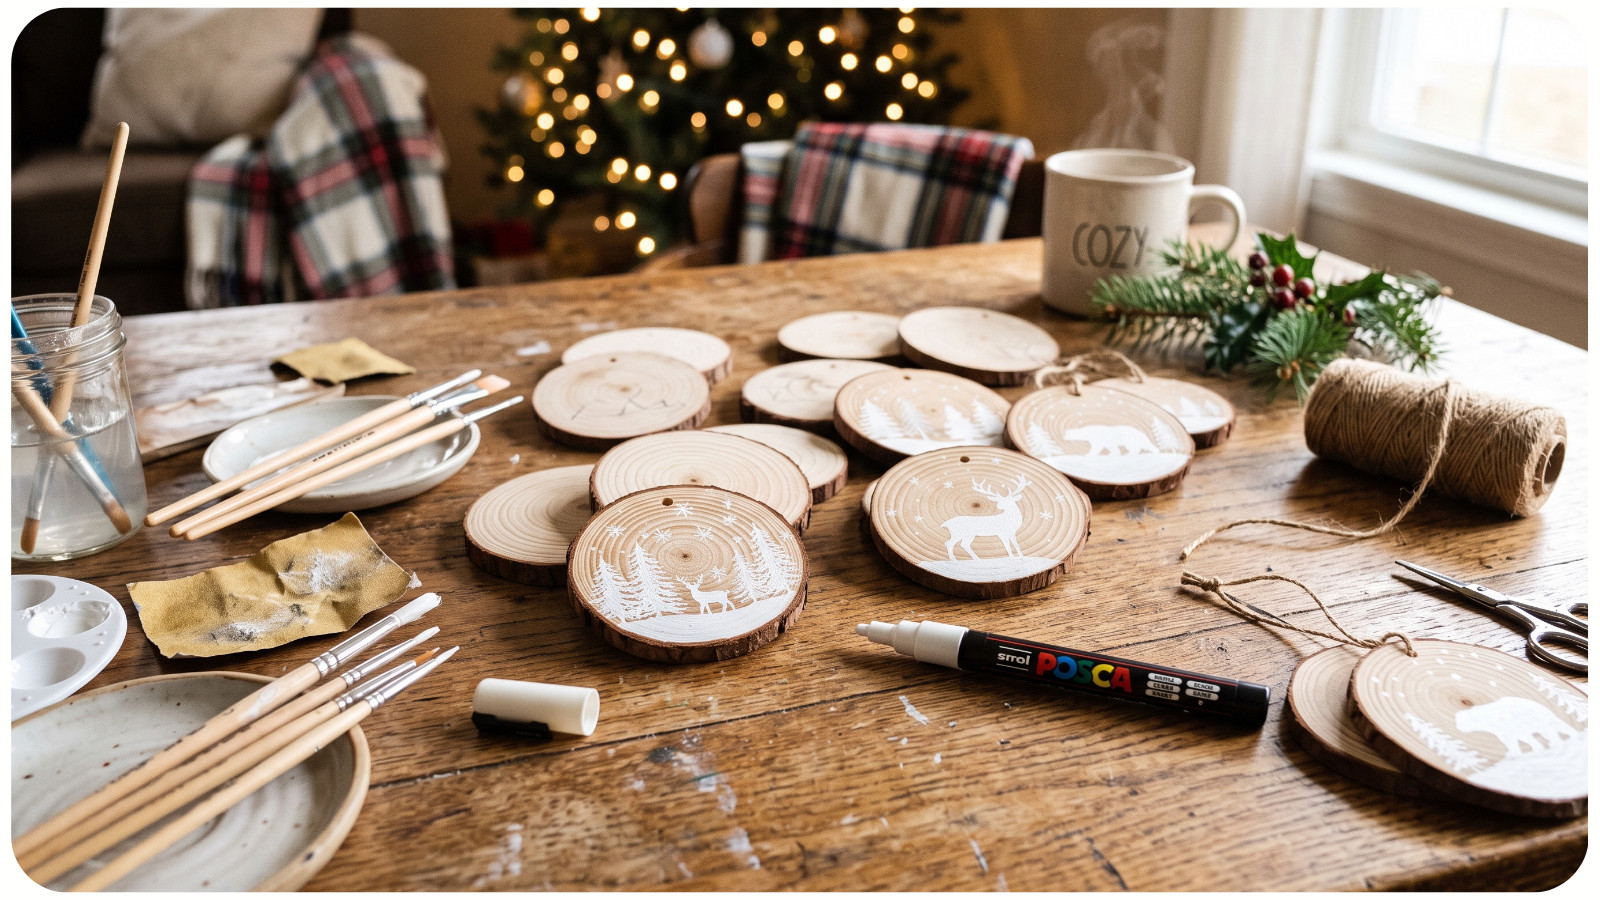
Wood-slice ornaments add natural warmth to Christmas trees, gift packages, winter garlands, and place settings. They can be painted, stamped, personalized, or left mostly natural.
Supplies:
- Small pre-drilled wood slices;
- Acrylic paint or paint pens;
- Rubber stamps, optional;
- Jute twine;
- Clear craft sealer;
- Fine-grit sandpaper.
How to Make It: Lightly sand the wood slices if the surface feels rough. Add simple designs such as pine trees, snowflakes, stars, cabins, deer, or winter messages.
Allow the paint to dry, then seal the surface if desired. Thread jute twine through the hole and tie a loop.
Rustic Styling Tip: Paint only part of the wood slice so the natural grain remains visible. White designs on unfinished wood create a simple Scandinavian-inspired look.
HOW TO PREPARE NATURAL MATERIALS FOR CRAFTING
Natural materials often need a little preparation before they can be used safely and successfully indoors.
Shake away loose dirt and inspect every item for insects or damage. Wash smooth stones and seashells with mild soap and water, then dry them fully. Press leaves and flowers before using them in flat artwork. Allow twigs, pinecones, and seed pods to dry in a well-ventilated area.
Some natural items can fade, crack, or change shape over time. This is part of their organic charm, but a clear craft sealer may help preserve painted stones, wood slices, and certain dried decorations.
Avoid collecting materials from protected areas, private property, or places where gathering is prohibited. Never remove active bird nests, living moss from fragile habitats, or plants you cannot identify safely.
ESSENTIAL SUPPLIES FOR NATURE-INSPIRED CRAFTS
You do not need a large collection of tools to begin crafting with natural materials. A small basic kit can be used for projects throughout the year.
Helpful supplies include:
- Craft scissors;
- Garden shears;
- Hot glue gun;
- Clear-drying craft glue;
- Floral wire;
- Jute twine;
- Acrylic paint;
- Paintbrushes;
- Decoupage glue;
- Air-dry clay;
- Battery-operated tea lights;
- Clear craft sealer.
Keep these items together in a labeled bin so you can start a seasonal craft whenever inspiration appears.
TIPS FOR CREATING WARM, RUSTIC DECOR
Rustic nature crafts are most effective when they feel relaxed rather than overly polished. Natural variation is part of the style, so twigs do not need to be perfectly straight and dried flowers do not need to match.
Use a limited color palette inspired by the season. Spring works well with soft green, blush, cream, and pale blue. Summer can include sandy beige, ocean blue, sunny yellow, and fresh botanical green. Fall is ideal for rust, amber, brown, and muted orange. Winter looks cozy with evergreen, white, gray, natural wood, and deep red.
Materials such as linen, burlap, jute, unfinished wood, clay, and galvanized metal pair especially well with nature-inspired projects. Combining two or three textures will make a handmade display feel layered without becoming cluttered.
CONCLUSION
Nature-inspired crafts offer a simple way to notice and celebrate the changing seasons. Spring flowers can become framed art, summer stones can brighten the garden, fall leaves can glow inside handmade lanterns, and winter pinecones can turn into charming woodland ornaments.
These projects do not require advanced skills or expensive materials. Most can be completed with basic supplies and natural elements gathered close to home. Start with one seasonal idea, use the colors and textures you already enjoy, and allow small imperfections to become part of the finished design.
By crafting with flowers, leaves, stones, branches, herbs, and pinecones, you can create meaningful decor that feels warm, personal, and connected to the outdoors.