



A white flower can look ordinary at noon and almost luminous at dusk. A leaf that seemed flat in daylight casts a sharp shadow across the path. Then a moth appears for a moment and vanishes into the hedge. If you love making things inspired by nature, an evening garden offers fresh shapes, colors, and details for sketches, paper crafts, and stitched designs.
You don't need a large garden, a rare plant, or a perfect view of the moon. A balcony pot, a walk around the block, or a few photos taken at twilight can be enough. To find night garden craft ideas, look at the scene as a maker: notice the outline of a petal, the space between leaves, and the colors that remain as daylight fades.
What Makes a Night Garden Different?
A moon garden is a planting designed to be enjoyed in the evening. Pale flowers and silver-toned foliage remain easy to see in fading light, while some flowers open or become more fragrant after dusk. A plant does not need to bloom only at night to belong in one. Moths are among the pollinators that visit flowers at night, although some moth species are active during the day. The University of Minnesota Extension describes moon gardens and the role of nocturnal pollinators, while the Royal Horticultural Society suggests evening-scented plants such as evening primrose for moth-friendly gardens.
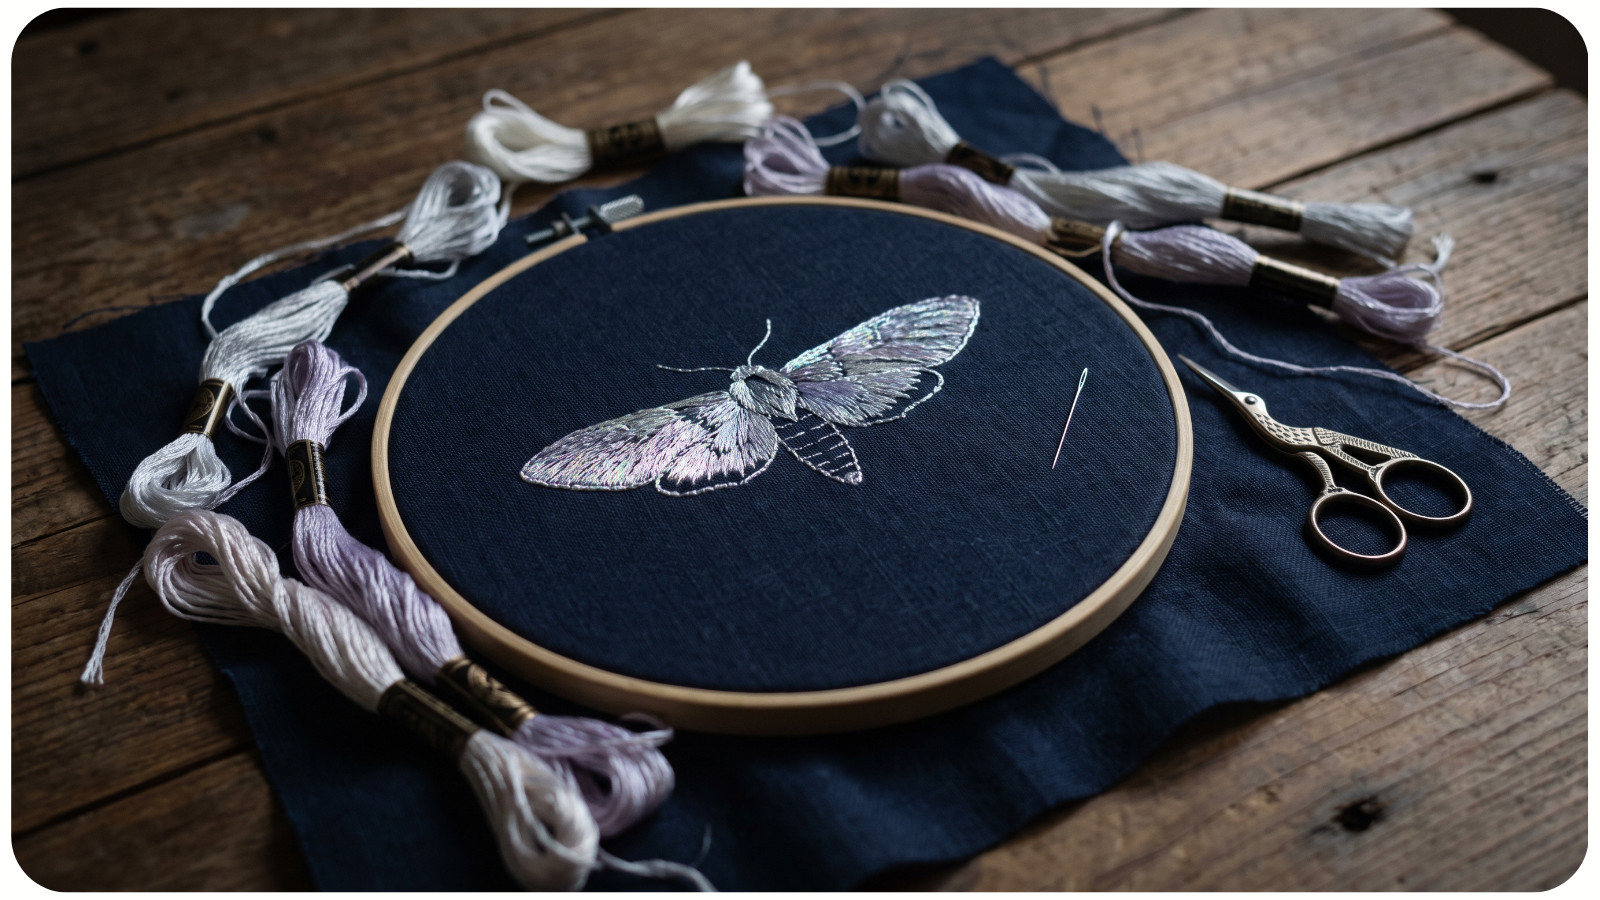
For a creative project, you can borrow the mood without copying a real garden. Think of a pale bloom framed by dark leaves, a moth wing marked with tiny bands, or a stem seen only as a silhouette. Those simple choices give a piece its nighttime feel.
Start With a Short Dusk Walk
Go out while there is still enough light to see color. Bring your phone or a small notebook, and collect observations, not plants. Notice which leaves overlap, how one white flower stands out against a shaded wall, and whether a moth's wings look more like a pointed triangle or a soft fan. You may find inspiration in a public garden or in a single planter outside your door.
Take one wide photo for the overall scene and two close photos of details. If you sketch, draw the shapes quickly instead of trying to identify every species. Try tracing just the empty space between a few stems. That negative shape can become a border, a paper-cut opening, or the background of a stitched motif. If you like collecting motifs in thread, this look at historic needlework samplers shows how small flowers and borders can form a personal visual record.
If you don't have outdoor access at dusk, work from your own daytime plant photos. Darken the background in a rough sketch, then choose which edges would stay visible in low light. Treat it as an imagined scene, not a record of how that plant looks at night.
Build a Moonlit Color Palette
Midnight blue is an easy starting point, but a night-garden palette needs more than dark blue. Try charcoal with cream, moss green with soft gray, or deep plum with a small touch of warm gold. Keep the lightest shade for the part you want people to notice first, such as a flower, a wing marking, or the curve of a leaf.
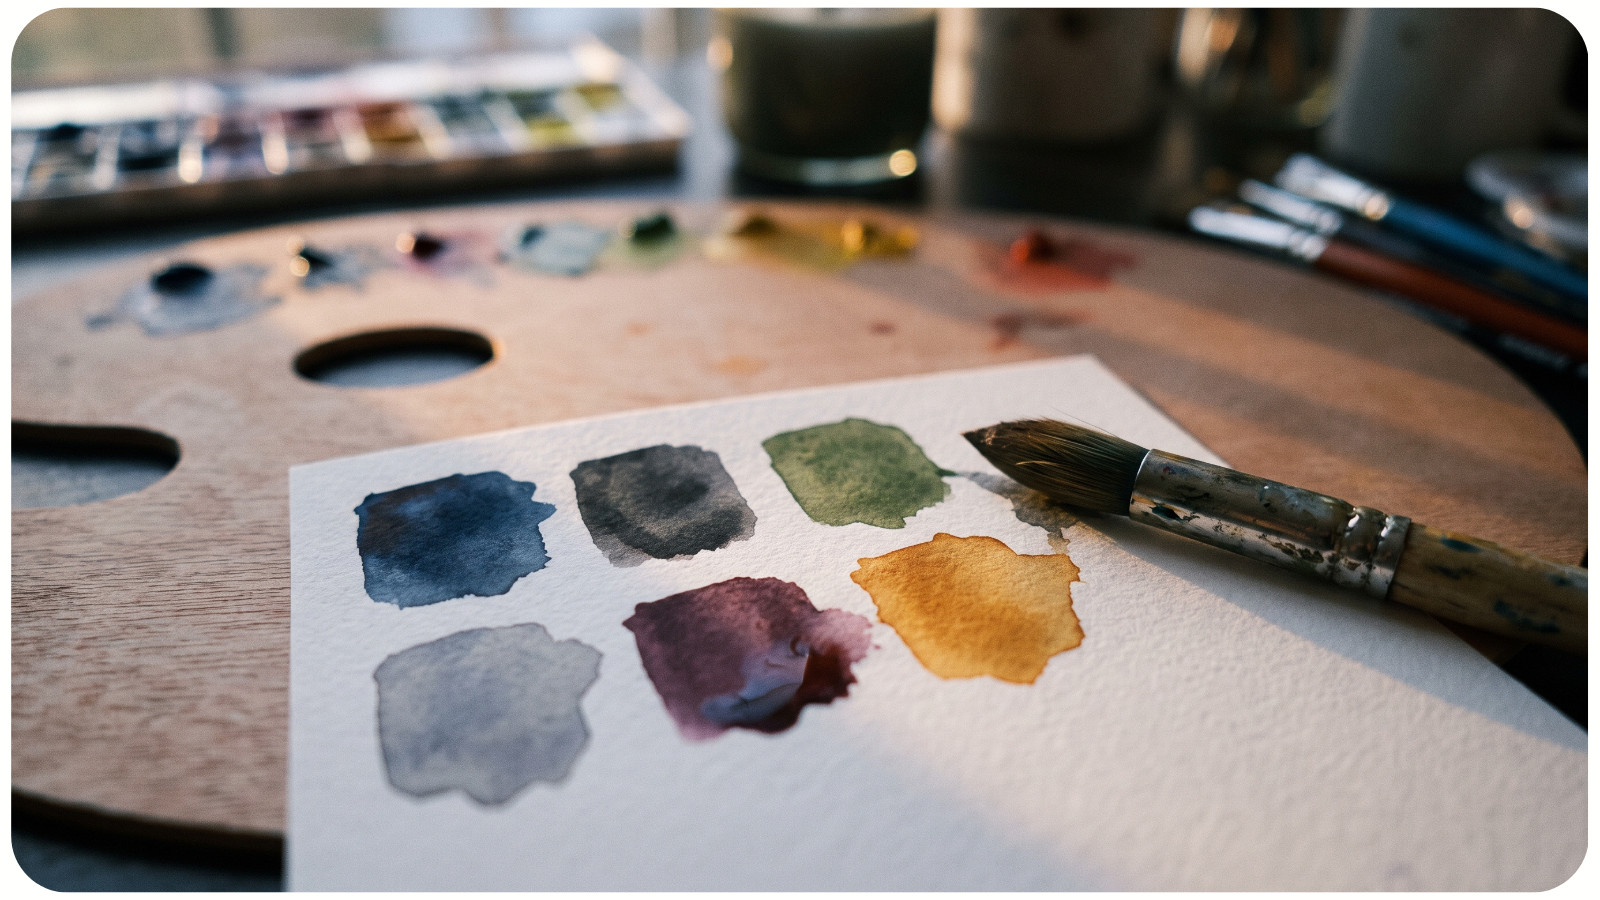
One way to test a palette is to make six small swatches on paper or fabric. Give about half the space to your darkest color, then add two quieter midtones. Reserve the pale shade for a few clear shapes. This is a design exercise, not a rule: if a warm porch light is part of your memory of the garden, a little amber may feel truer than silver.
Before choosing materials, view your swatches from across the room. If the flower disappears into the background, make its edge lighter or give it a narrow gap of dark space. This matters especially in cross-stitch, collage, and small embroidery pieces, where delicate details can merge when seen from a distance.
Turn Moth Wings Into a Pattern
Moths bring more to a project than a familiar butterfly shape. Their wings can suggest narrow stripes, eye-like spots, ragged edges, or layered triangles. The RHS notes the variety of moth colors and markings, including camouflage and bold patterns. Its guide to moths in the garden is a useful reminder to look beyond the plain brown moth of a quick sketch.
For an approachable first project, fold a piece of paper and draw one wing. Cut through both layers, unfold it, and place the shape against dark card. Add a few small cutouts or painted marks, but let the wing outline do most of the work. It can become a greeting card, a bookplate, or a stencil for a fabric patch.
If you prefer thread, sketch a single moth above a sprig of leaves. Work the body and large wing areas first. Add markings only after checking how the piece looks from normal viewing distance. You can make the two sides roughly balanced without forcing every tiny mark to match. The result will feel more like a living creature and less like a mirrored logo.
Make Moonlit Plants the Main Character
A flower does not have to be botanically rare to carry this theme. A familiar pale bloom can look striking against dark paper or fabric. Evening primrose is one real night-garden reference, but your project can also use an invented flower with broad petals and a clear center. If you are creating a botanical record, observe a real plant closely. For decorative work, you are free to combine the shapes you like.
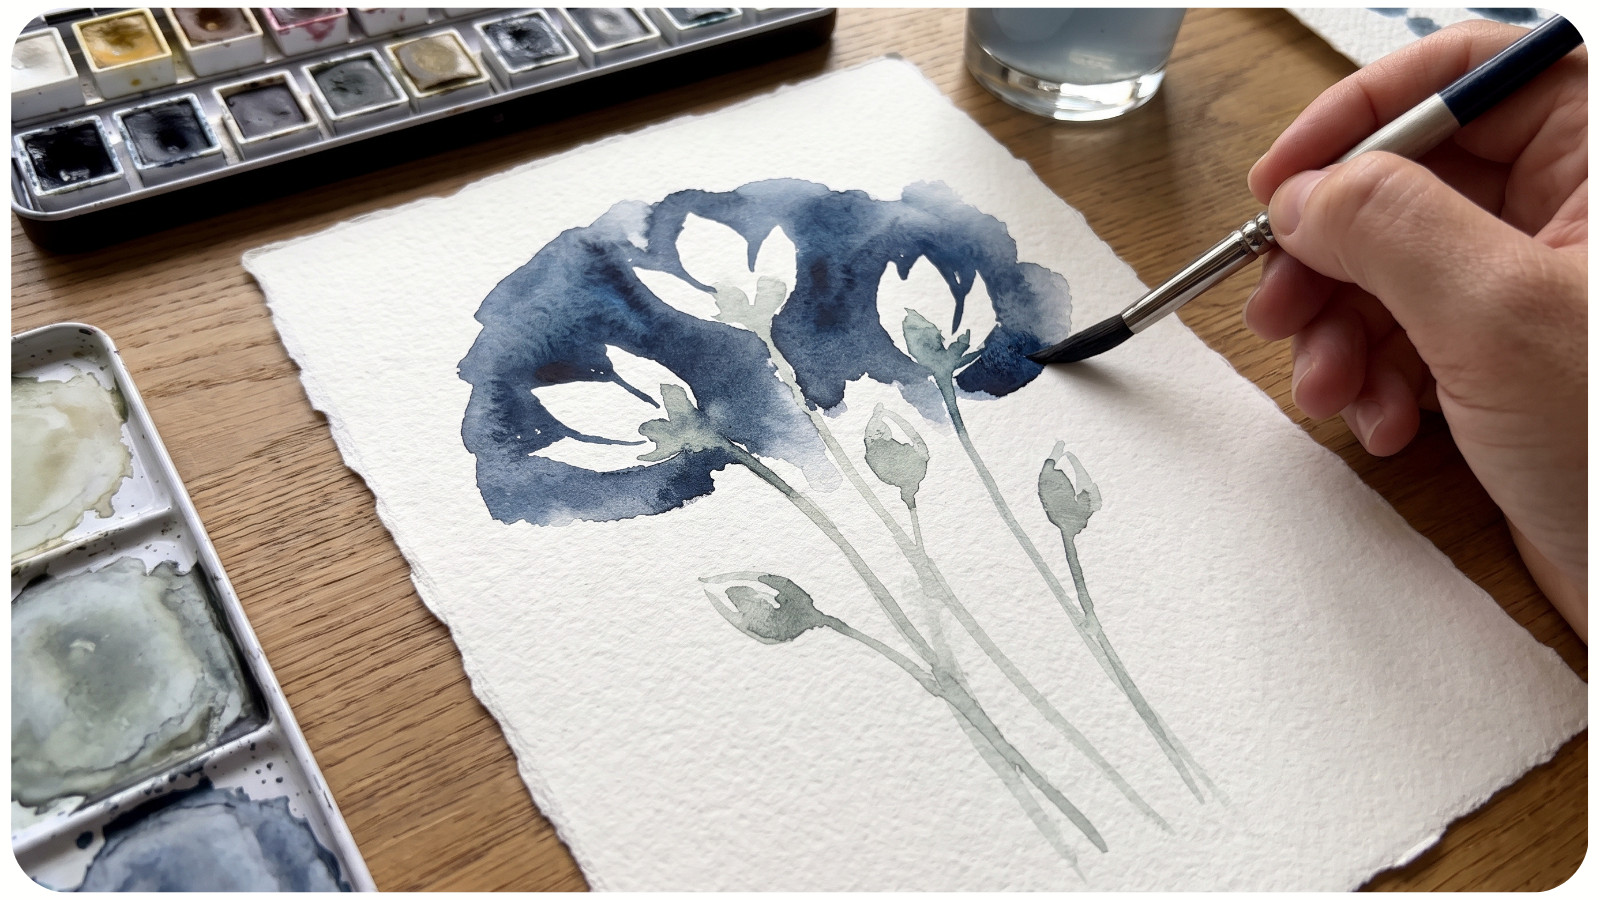
Try painting three stems in diluted gray-green watercolor, leaving the petal shapes as unpainted paper. Once dry, add a dark wash around them. The light areas will feel bright without white paint. If watercolor isn't your medium, cut pale petals from scrap paper and layer them over navy card. One overlapping leaf and one seed head will make the scene feel more lived in than a row of identical flowers.
For a larger project, repeat a few plant shapes at different heights along the edge of a cushion, journal cover, or framed hoop. Leave the center open. That quiet space lets a single moth or crescent moon become a focal point without crowding the design.
Try a Small Project Before a Full Scene
Night-garden inspiration is easy to turn into a complicated plan. Start with a manageable object; the time it takes will depend on your materials and pace:
• A botanical bookmark: Arrange one pale flower and two dark leaves on a narrow strip of card. Keep the shapes large enough to read at bookmark size.
• A paper window scene: Cut plant silhouettes from dark paper and layer them over a soft gray background. Shift the layers until the gaps resemble a garden path.
• A stitched moth patch: Use a simple wing outline, two or three thread colors, and a few larger markings. Sew the finished patch to a tote or keep it as a sample for a future piece.
• A nature journal spread: Place your dusk photos beside quick sketches, color swatches, and a note about what caught your eye. It's a record of your choices, not a test of drawing skill.
Choose the material you already enjoy. The same composition might become a cross-stitch motif, a linocut, a collage, or a piece of hand embroidery. If you want to combine materials, read our guide to mixing craft techniques. Let the project grow only if the small version leaves you curious.
Let the Real Garden Stay Dark
If you are taking photos outdoors, use the available evening light when you can and keep bright lights brief. The RHS advises aiming outdoor lights downward, switching them off when they aren't needed, and choosing warm-toned bulbs because artificial light can distract moths from feeding and mating. Read its moth-friendly lighting advice. A photograph in the last daylight often gives you more usable shapes anyway.
There is pleasure in working from what you actually saw: a moth that stayed only a second, a leaf that looked silver at one angle, or a flower you noticed on an ordinary walk home. Pick one detail tonight and make a thumbnail sketch. If you want to keep that habit going, try one small craft a day for a week. A single leaf shape may be enough to begin.